NOTE #1: Migrating a copy of your site with this guide will NOT affect your existing site
NOTE #2: In order to migrate a site to Strattic you do not need to complete the installation process for your default Strattic WordPress install. The migration process below will replace your default site.
Watch the Video (or Keep Reading Below)
This video shows you how to migrate your WordPress site to Strattic in 5 easy steps.
Step-by-step Instructions
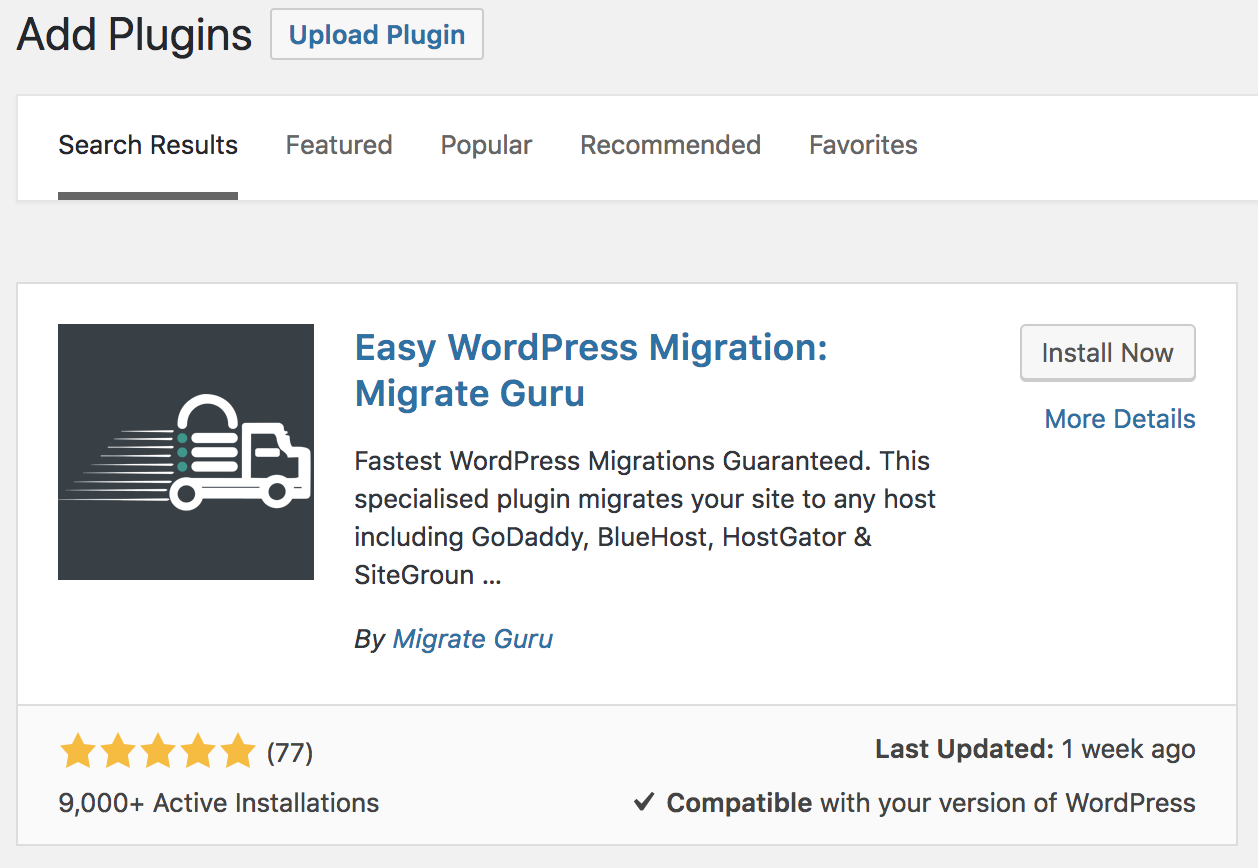
Step 1.
Log in to the site you want to migrate to Strattic. Go to Plugins > Add New and search for the Migrate Guru plugin and then click the “Install Now” button.
Step 2.
Then, click Activate.
Step 3.
Go to the Migrate Guru settings from the left-hand menu.
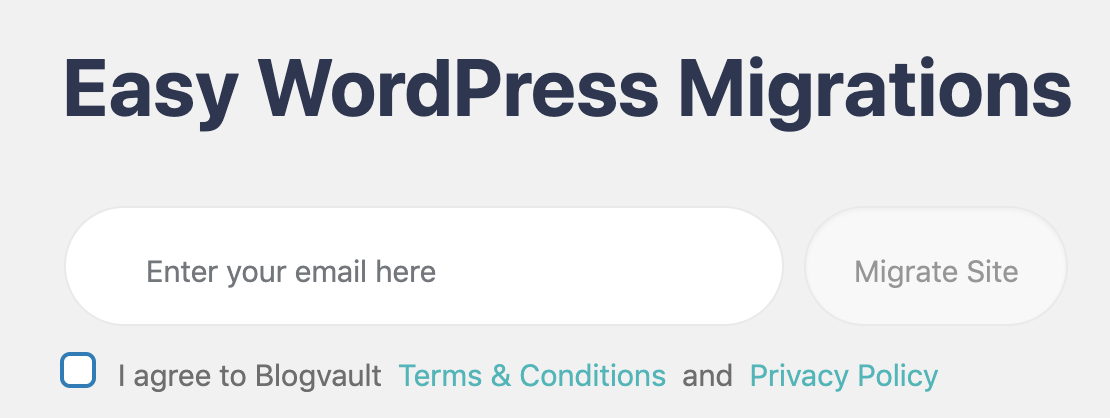
Step 4.
Fill out your email address and click “Migrate Site”
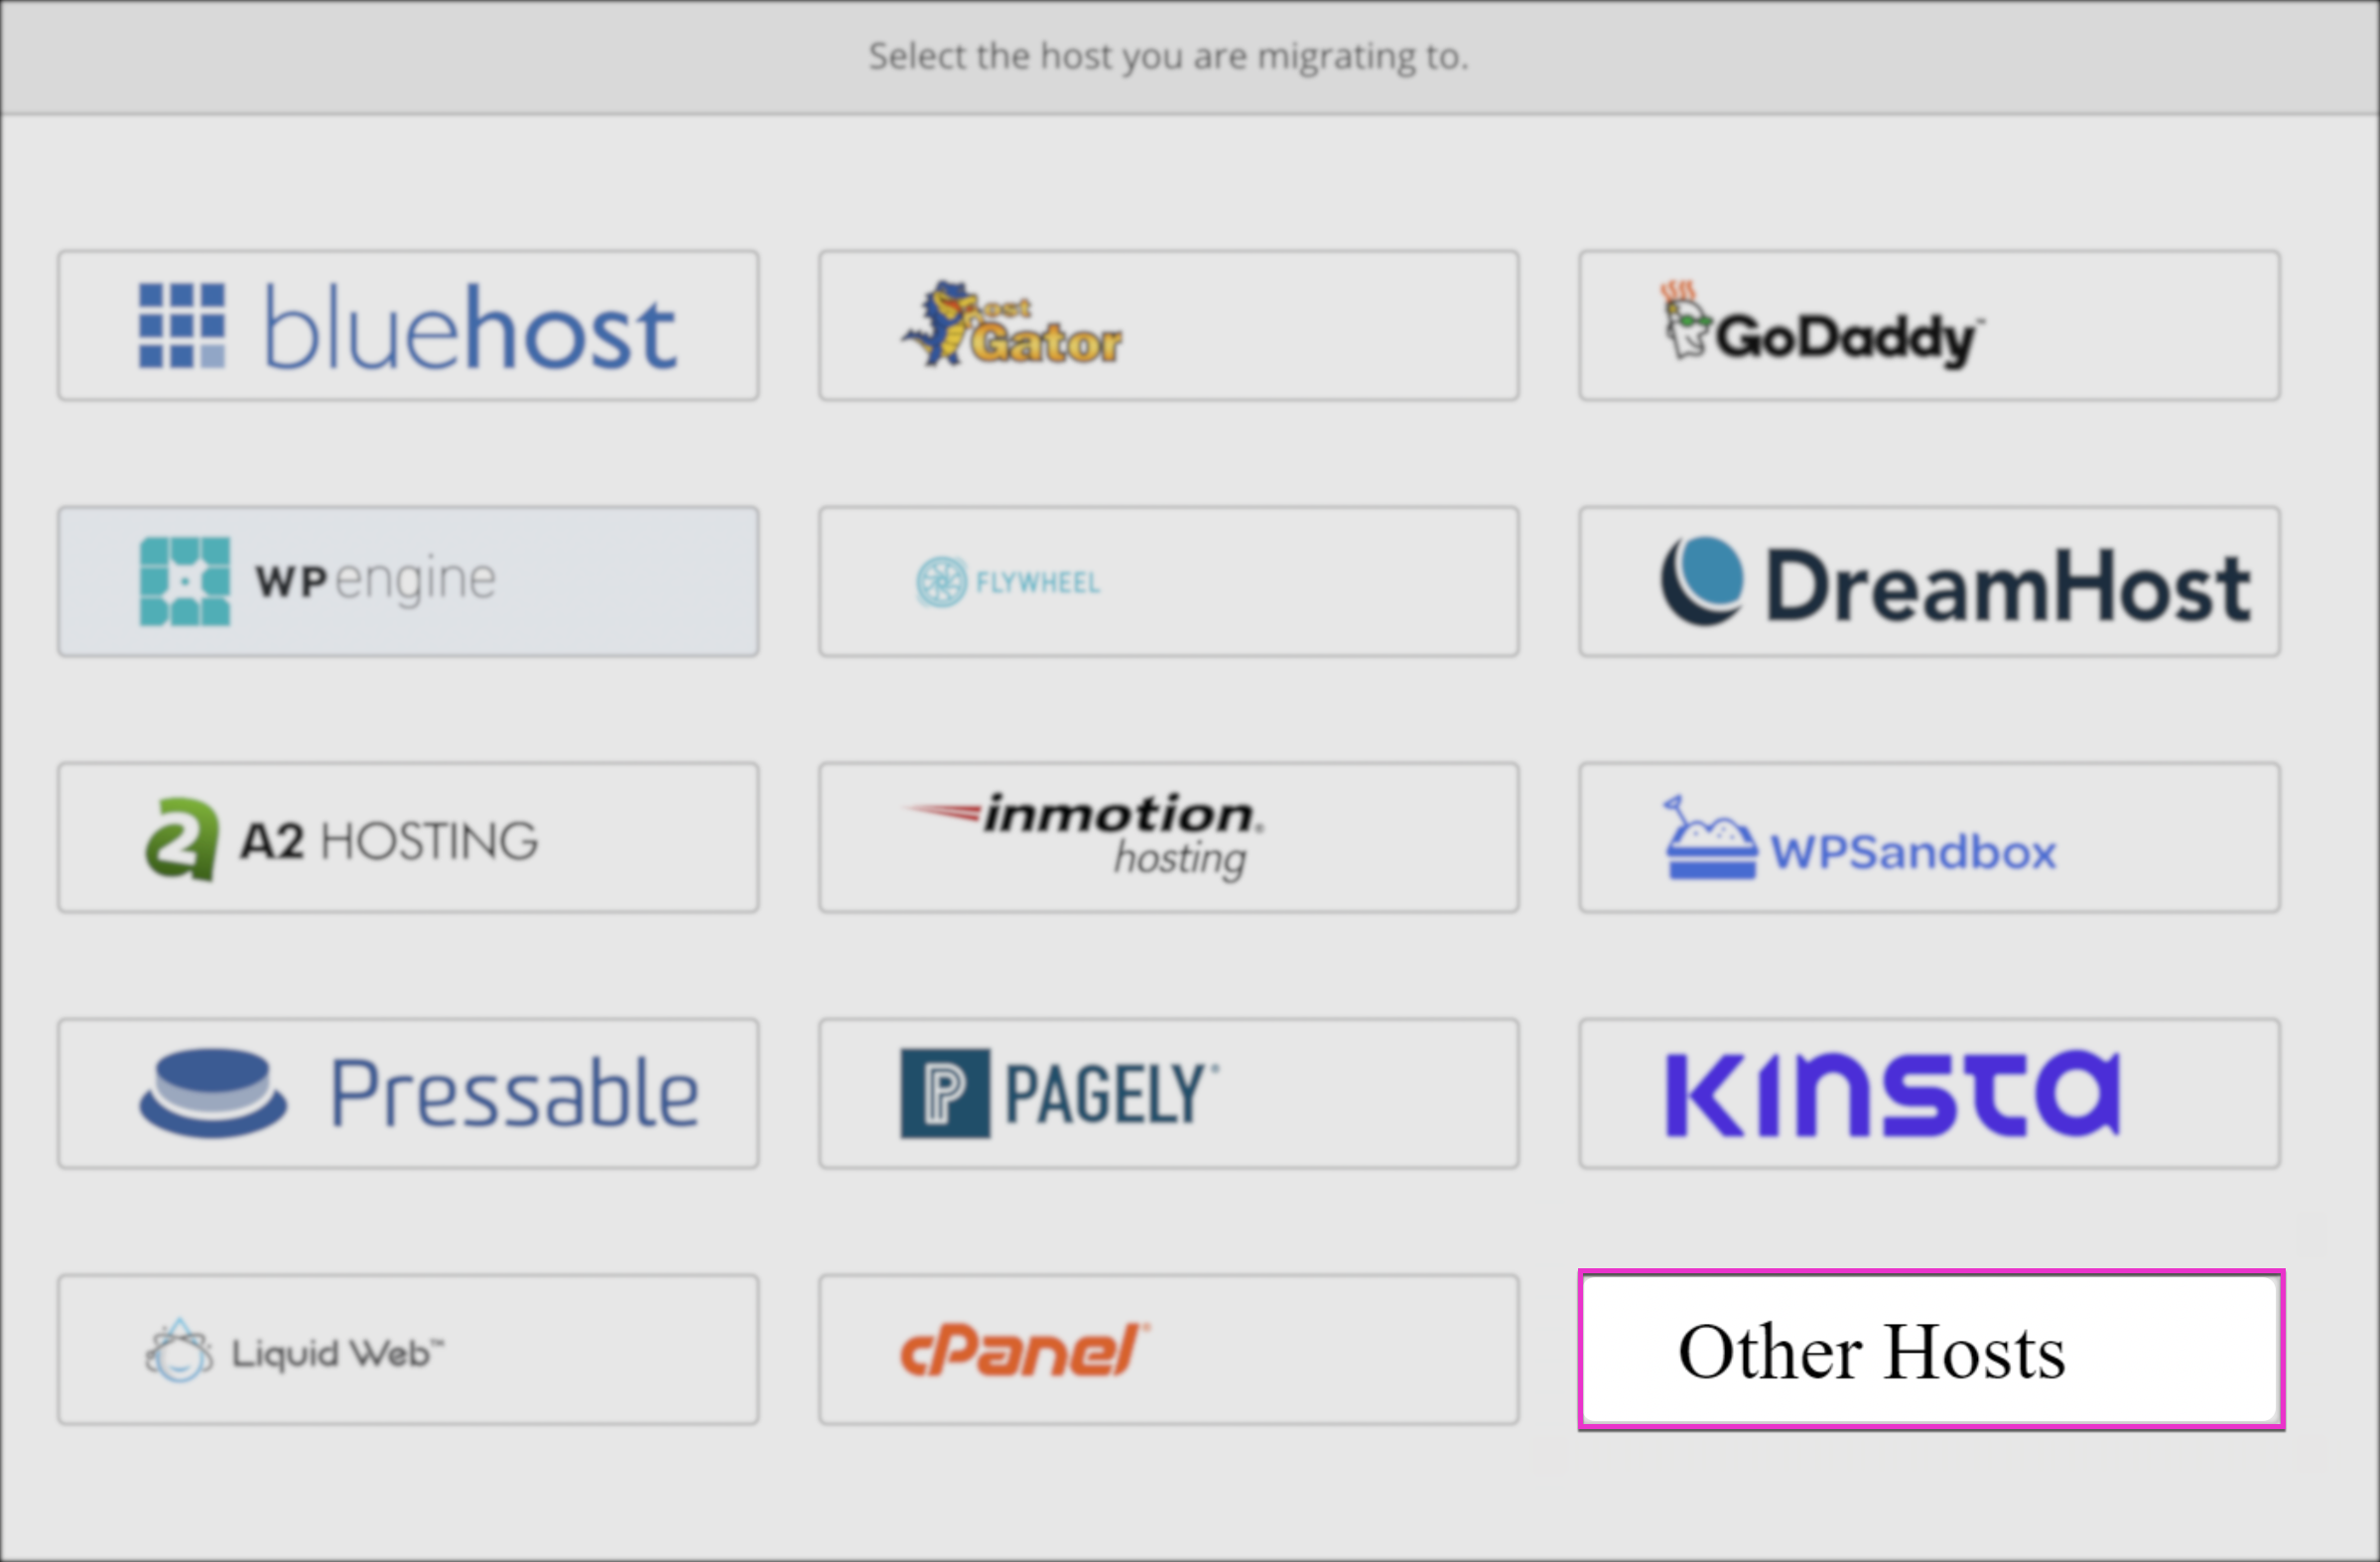
Step 5.
On the next screen, select “Other Hosts“
Step 6.
On the next screen, click Manually Input Host Details.
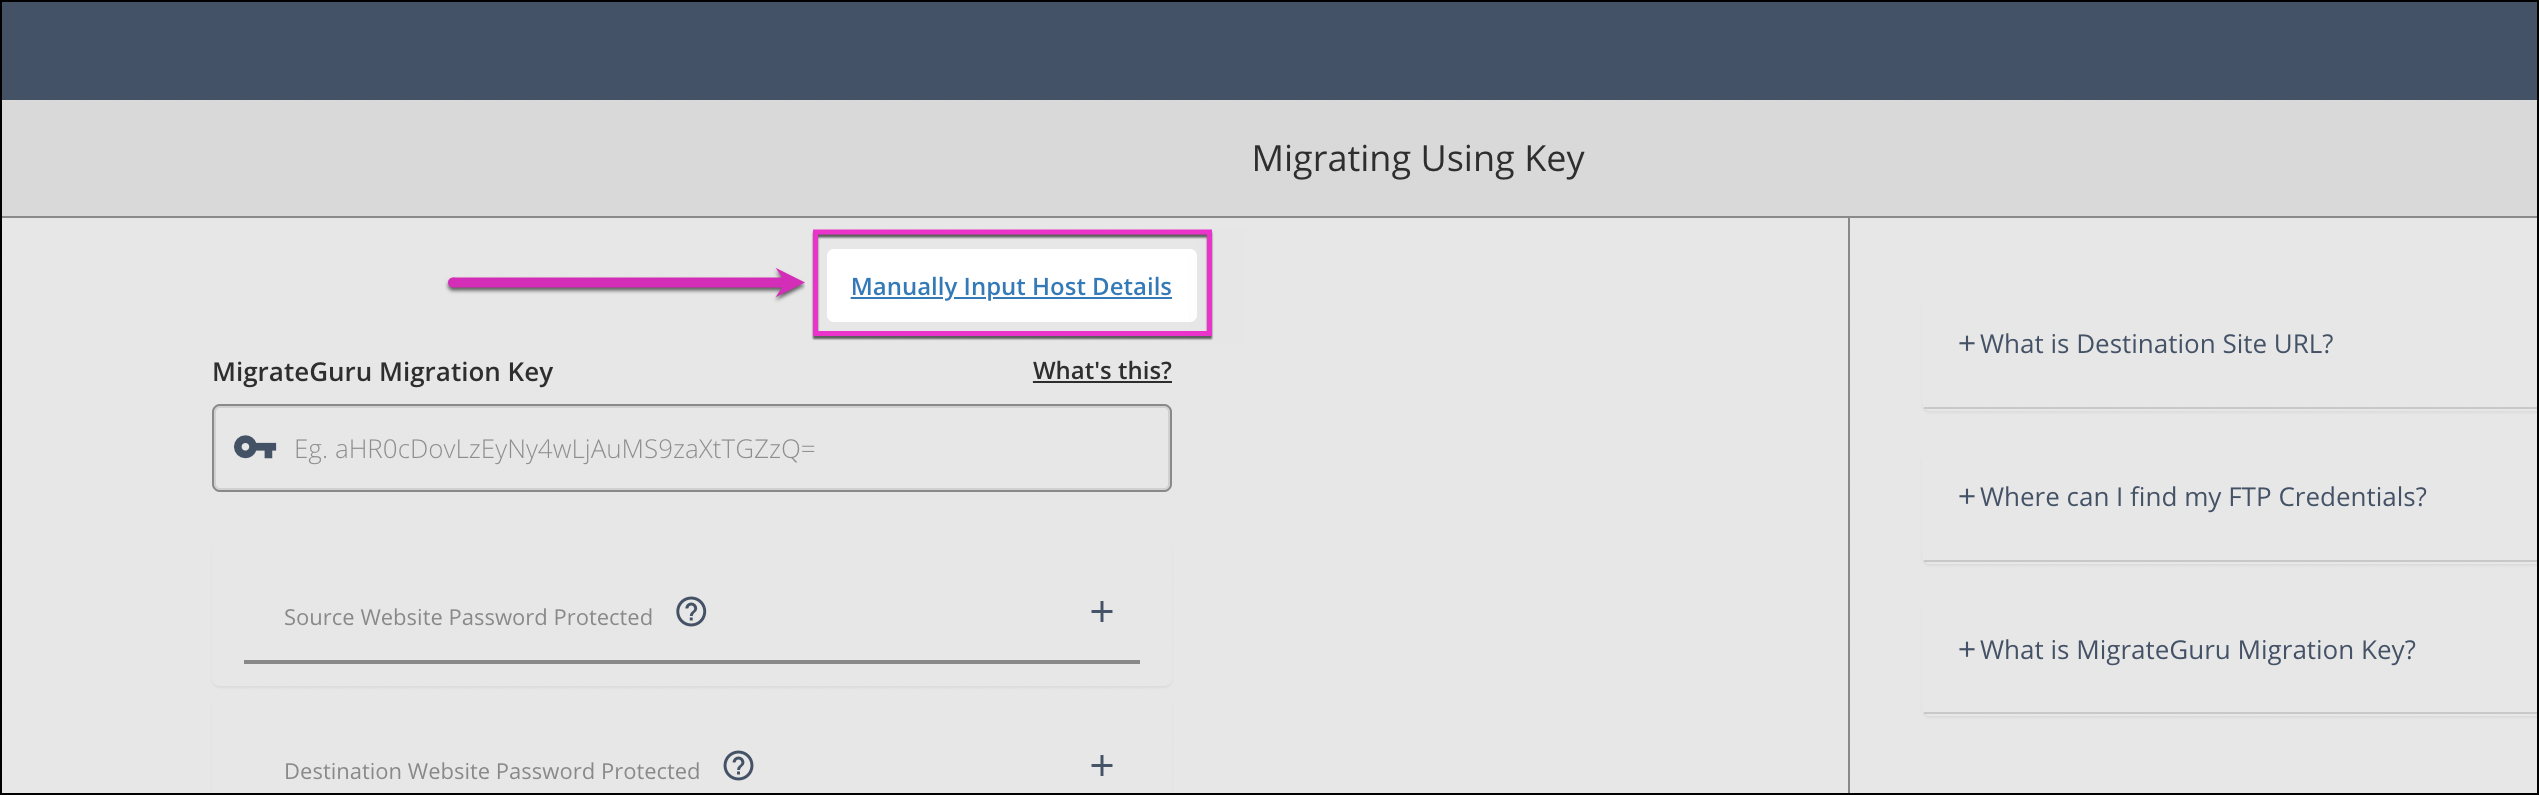
This will reveal the required FTP fields which you must fill in.
Step 7.
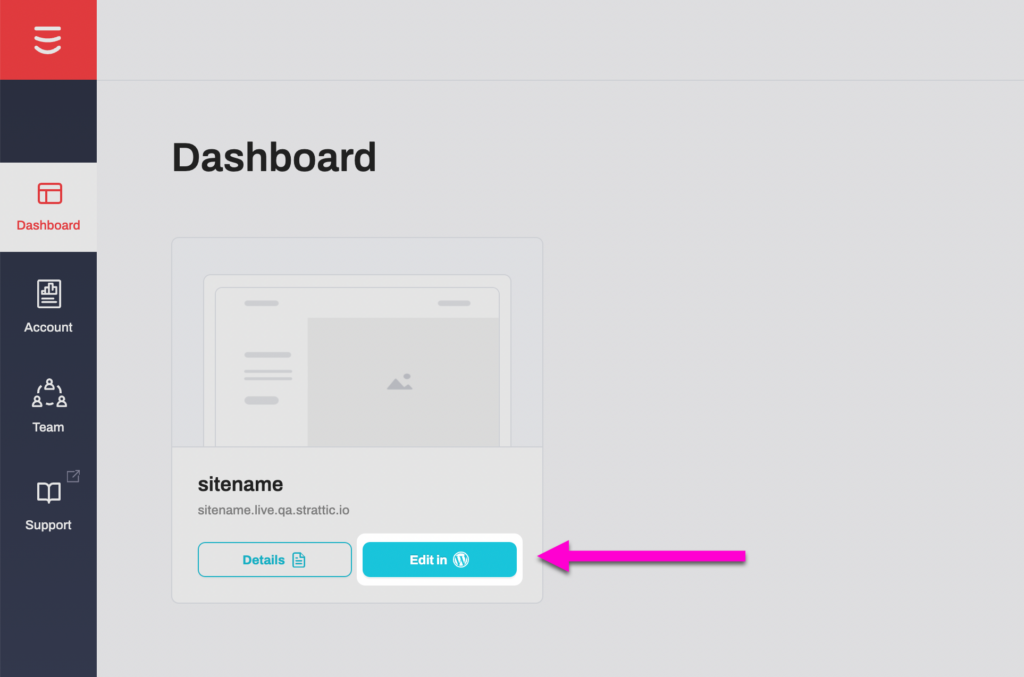
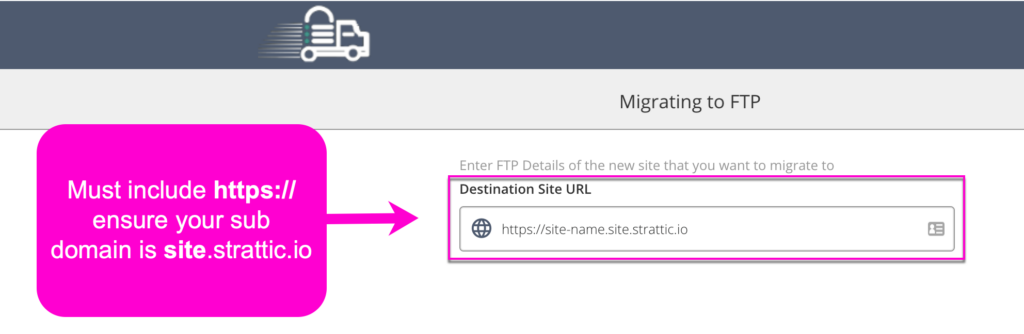
For the Destination Site URL, log in to the Strattic Dashboard and click “Edit in WP” (this is important as it spins up your site’s container making it accessible online)
Depending on your browser, after the container spins up, you may see a HTTP Auth prompt to sign in
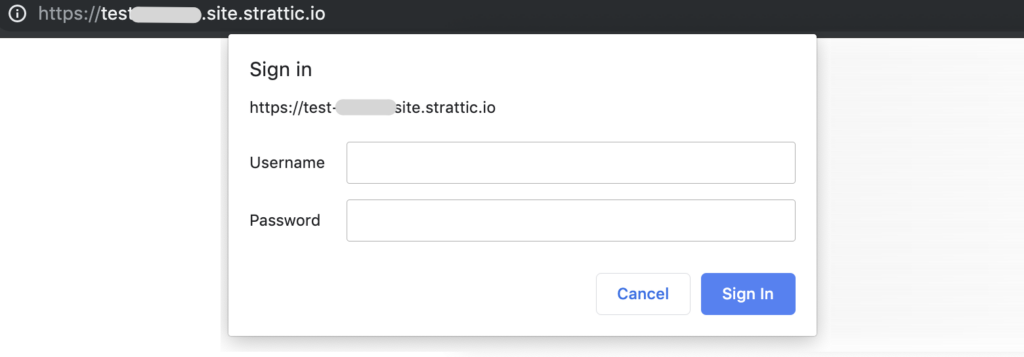
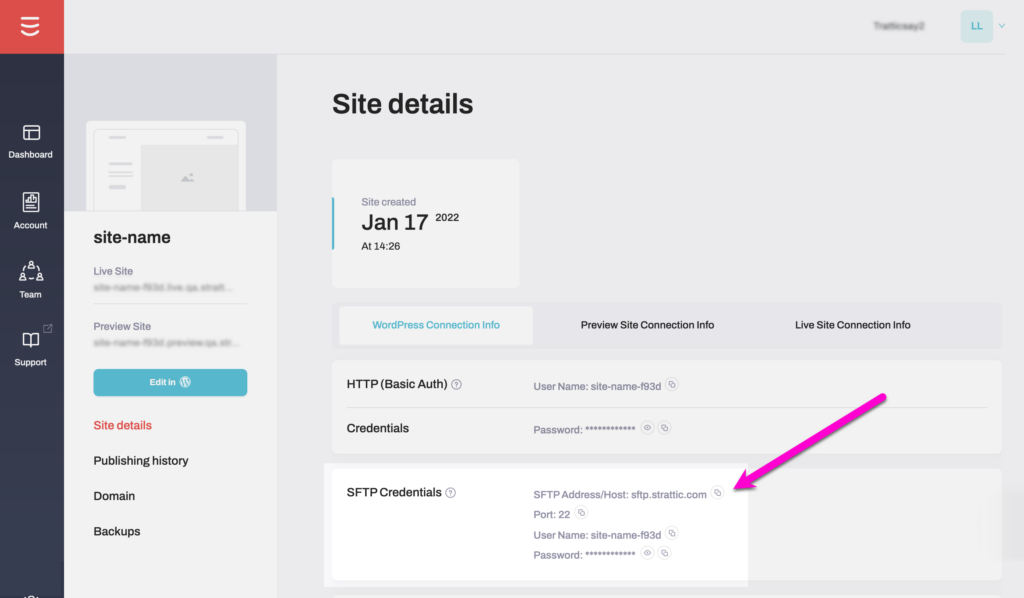
These credentials can be found in your Strattic Dashboard, by clicking on “Details”
After you get past the HTTP Auth screen, copy the root of the WordPress staging URL (without the /wp-admin/install.php)
You DO NOT need to complete the famous 5-minute WordPress installation.
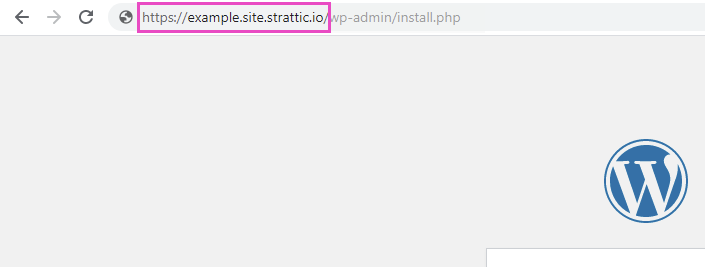
Paste the WordPress staging URL into the Destination Site URL field in Migrate Guru
⚠️ Important!
-
You must include https://
-
The subdomain must be .site.strattic.io (not .live.strattic.io)
-
Example:
https://yoursitename.site.strattic.io
Step 8.
For FTP Type, select SFTP

Step 9.
Enter the SFTP Details:
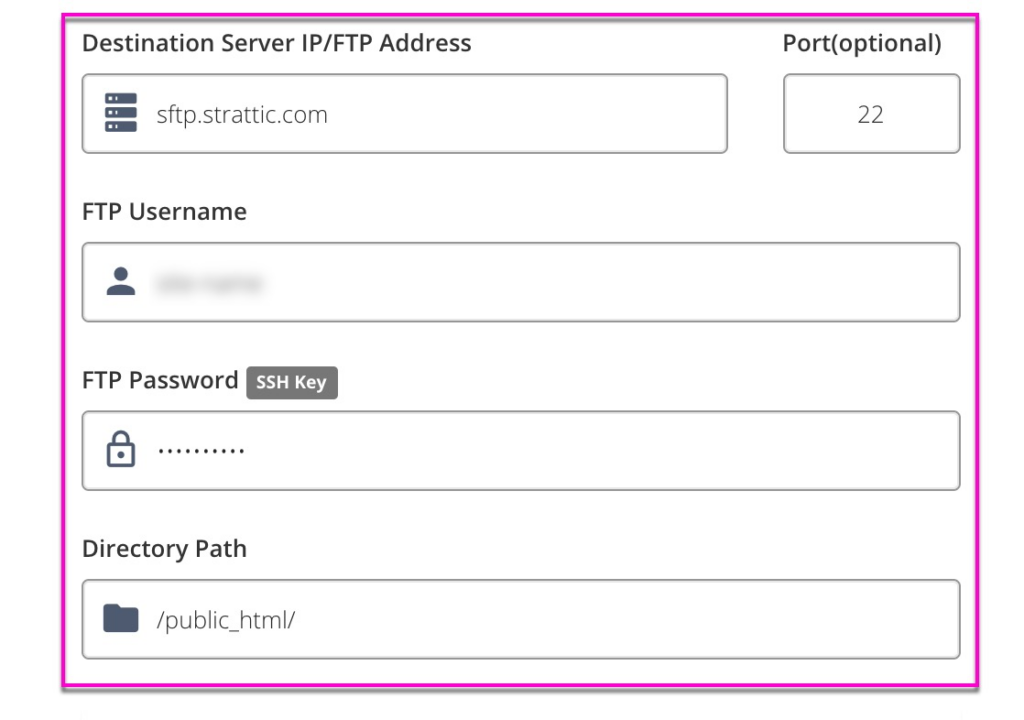
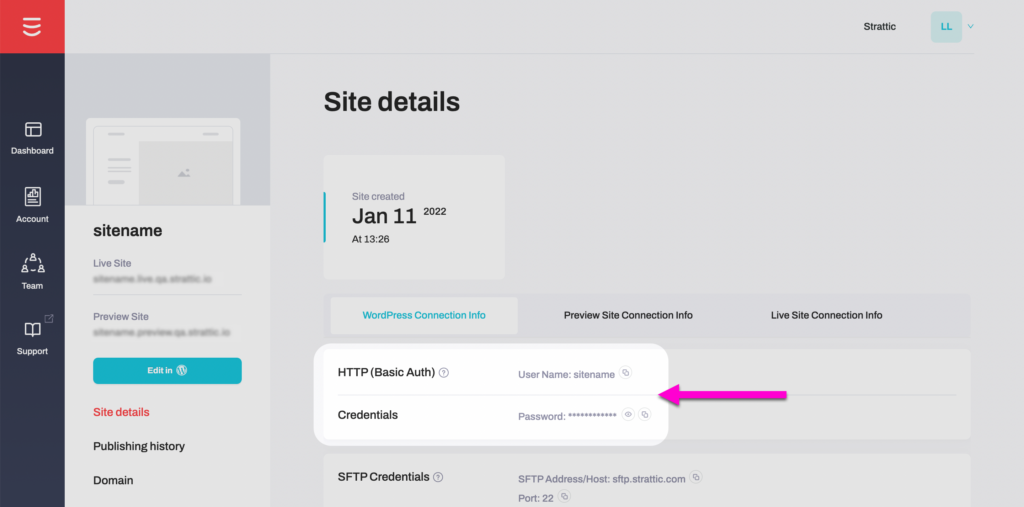
To get your site’s SFTP details, go to the Strattic Dashboard, click on your site “Details” button.
On your site details page, you will find your SFTP details within the WordPress Connection Info tab.
Step 10.
For the Directory Path, use /public_html/

Step 11.
Next click Destination Website Password Protected and enter the HTTP Auth Username and Password.
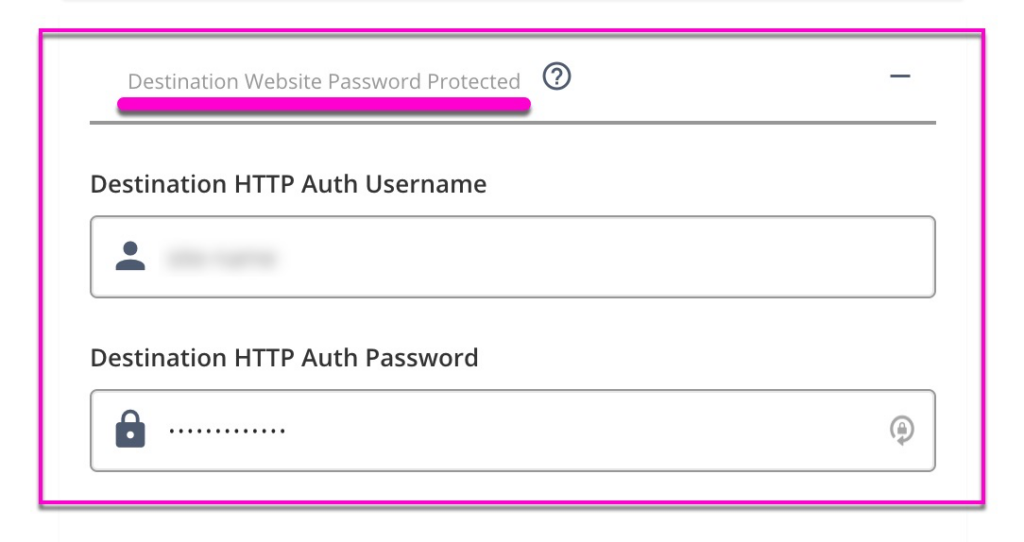
These HTTP Auth credentials can be found on your site details page.

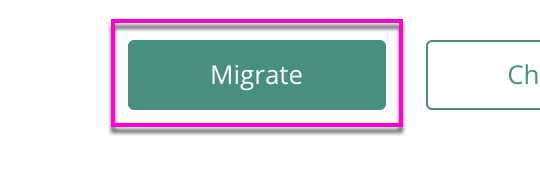
Step 12.
Click “Migrate” in MigrateGuru.
(If you get an error, please ensure all the information is correct)
Step 13.
MigrateGuru will then show you the progress of your migration and send you an email once it’s finished.
Step 14.
To see your migrated site, log into Strattic and click on the “Edit in WP” button.
Step 15. To publish your site on Strattic and convert your WordPress site to a static version of itself, check out our tutorial on publishing your site.
NOTE:
MigrateGuru doesn’t migrate the following plugins:
-
hide_my_wp
-
wordfence
-
bwp-minify
-
breeze
-
hyper-cache
-
w3-total-cache
-
wp-super-cache
Great job! You did it! 🎉
If you have any trouble or would like help with migrations, please reach out to support@strattic.com