Because verified owners have access to sensitive Google Search data for a site, Search Console needs to verify ownership.
If you would like to verify your site without the need for an additional plugin, the HTML File Method with SFTP is the best option for you.
If you have the Yoast SEO, Rank Math or Headers and Footers plugin already installed, then the HTML tag would be the easiest option for you.
HTML File Method with SFTP:
In this method, we will download an HTML file from the search console, then upload it to the Strattic SFTP server followed by a full publish to your live environment.
Step 1:
Login to Google Search Console
Step 2:
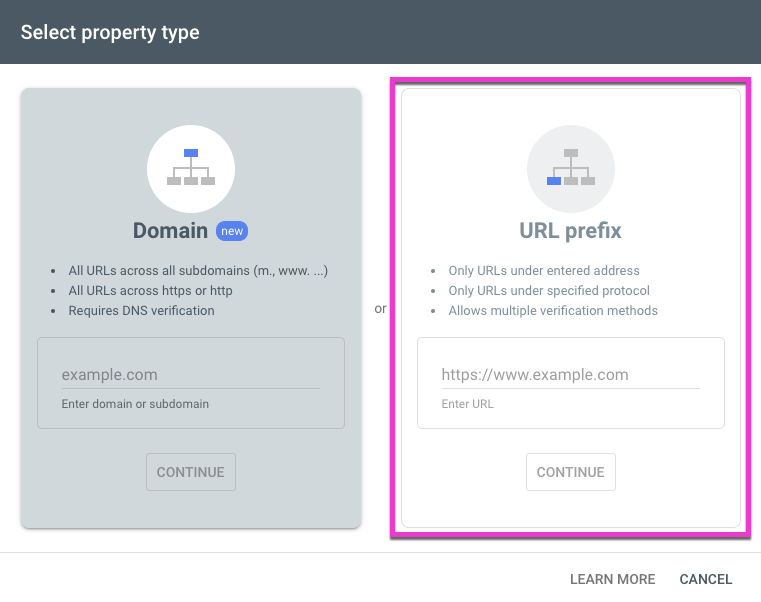
Add a new property. In this case, we are going to add our live custom domain URL to the URL prefix option. We use this option as the other method would require DNS verification. Click Continue.

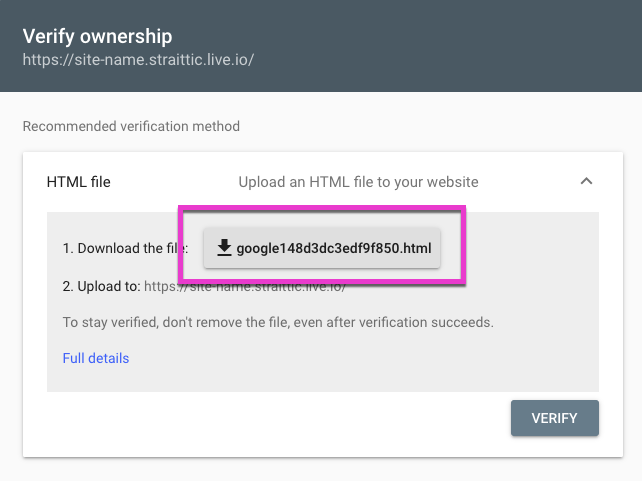
Step 3:
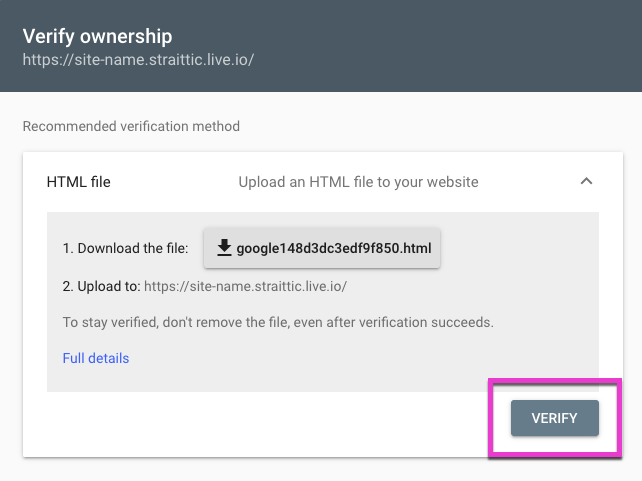
Download the HTML file to your computer.
Step 4:
Open your preferred SFTP program, we will use Cyberduck for the rest of this tutorial.
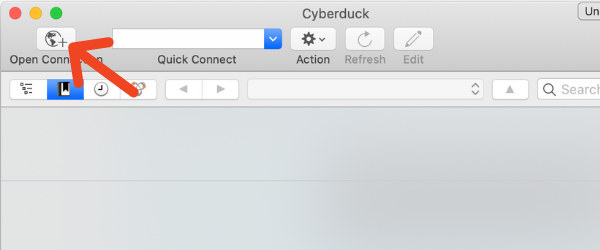
Step 5:
Click on “Open Connection”
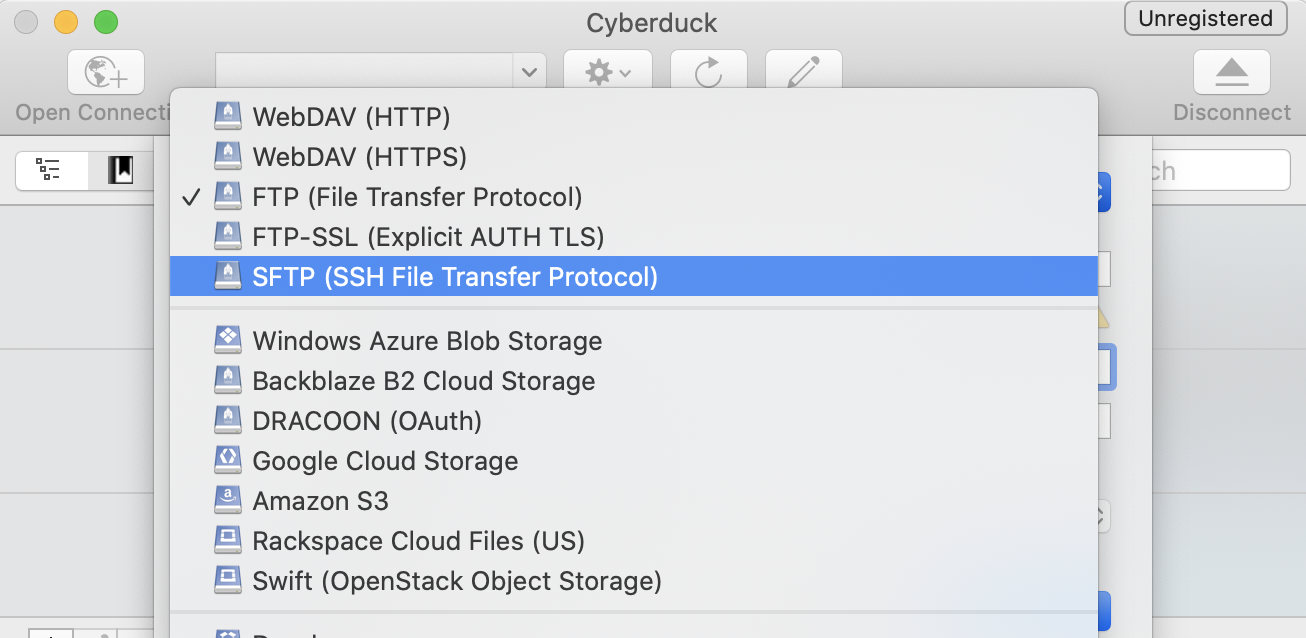
Step 6:
Select SFTP from the dropdown
Step 7:
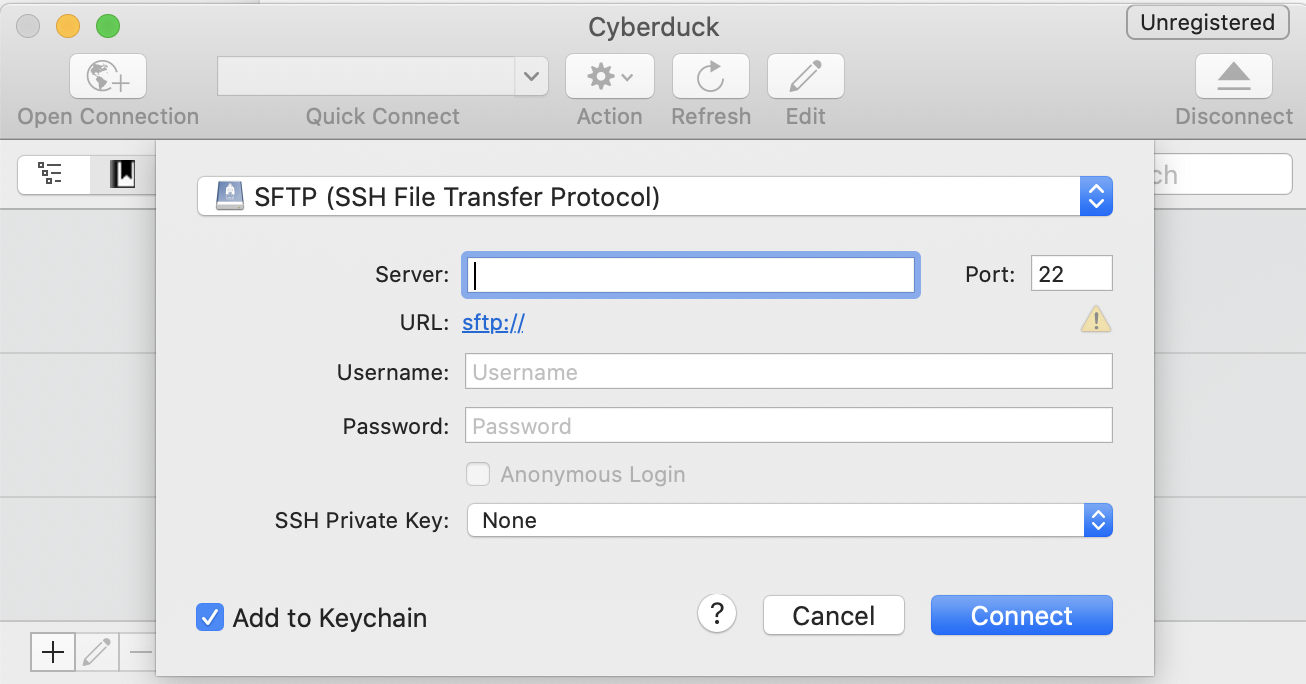
Login to your Strattic Dashboard, Press the details button for the site you want to connect to and look at the “Connection Info” tab for your SFTP credentials.
Enter the following information into Cyberduck:
-
Server: sftp.strattic.com
-
Port: 22
-
Username: from the details section in your Strattic Dashboard
-
Password: from the details section in your Strattic Dashboard
then click Connect
Step 8:
Once you’re connected, you can upload the downloaded verification file from step 3 to the server by dragging and dropping it into the application. You will want to upload that into the /public_html/ directory.
Step 9:
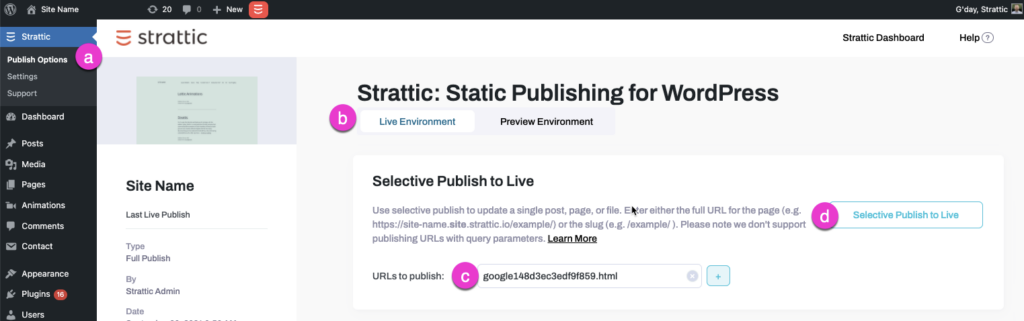
Once the file is uploaded, head back to your WordPress dashboard.
a. Go to Strattic > Publish options
b. Select Live Environment
c. Enter the filename of your google verification file. eg: google148d3ec3edf9f859.html
d. Click the Selective Publish to Live button.
Step 10:
After a successful publish, head back to the Google Search Console, click the Verify button.
HTML Tag Method with Headers and Footers plugin:
In this method, we will use the Header and Footers plugin to add the Google verification code to the <head> tag of your website.
Step 1:
Login to Google Search Console
Step 2:
Add a new property. In this case, we are going to add our live custom domain URL to the URL prefix option. We use this option as the other method would require DNS verification. Click Continue.
Step 3:
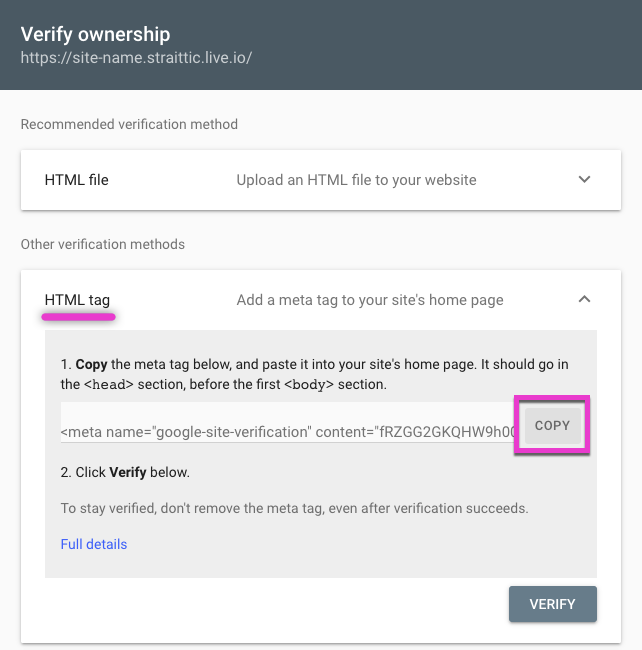
Select HTML tag from the verification methods, and copy the meta tag to your clipboard.

Step 4:
Now we will be adding the HTML Tag code to WordPress.
In order to make things simpler, we’ll add a plugin, which allows you to place the code in the header of your theme.
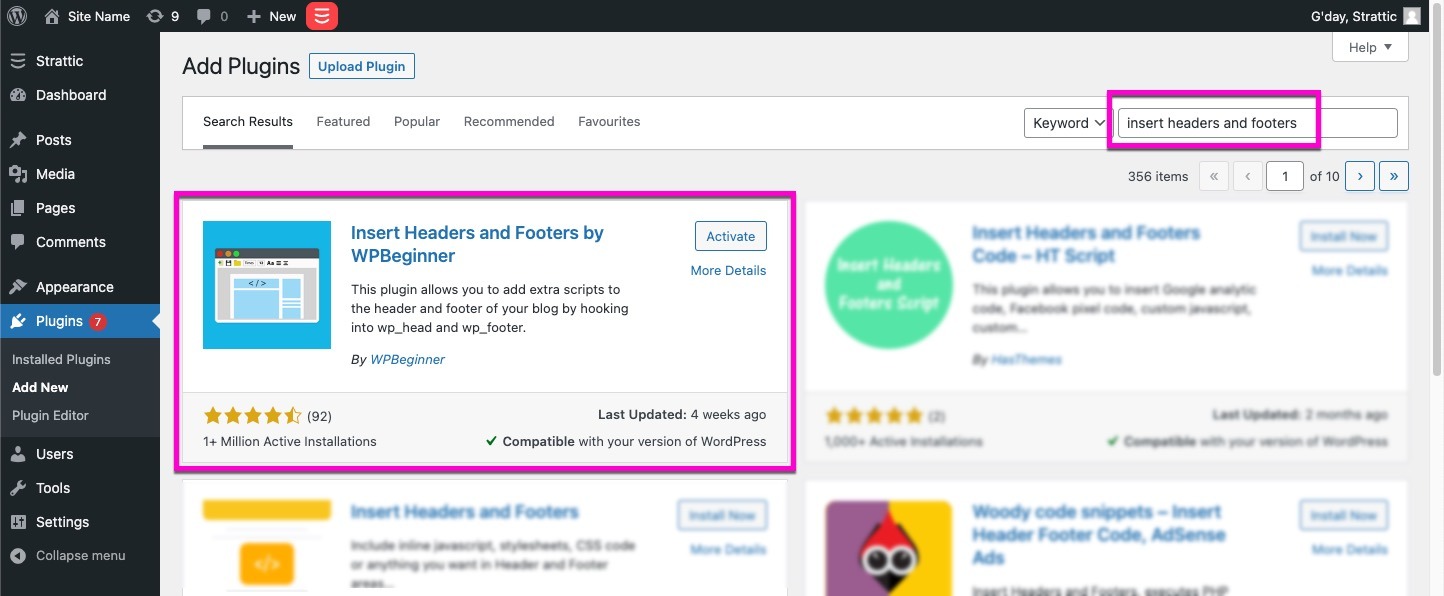
Log in to WordPress Dashboard. Go to Plugins > Add New and search for the Insert Header and Footers plugin and then click the Install Now button, then the Activate button.
Step 5:
After the plugin is activated, go to the Settings > Insert Headers and Footers page.
You will see a text area called Scripts in Header, paste in the HTML tag you copied in step 3.
Now hit that Save button!

Step 6:
You’ll need to complete a full publish to your live environment.
Just click the Strattic button in the admin bar > Select Strattic ‘Live Environment’> then click ‘Full Publish to Live’.
Step 7:
Once your publish has finished, head back into the Google Search Console and click verify.

Once you see the green banner that says “Ownership verified”, you’re done!
HTML Tag Method with Yoast SEO plugin:
In this method, we will use the Yoast SEO plugin to add the Google verification code to your website.
Step 1:
Login to Google Search Console
Step 2:
Add a new property. In this case, we are going to add our live custom domain URL to the URL prefix option. We use this option as the other method would require DNS verification. Click Continue.

Step 3:
Select HTML tag from the verification methods, and copy the meta tag to your clipboard.
Step 4:
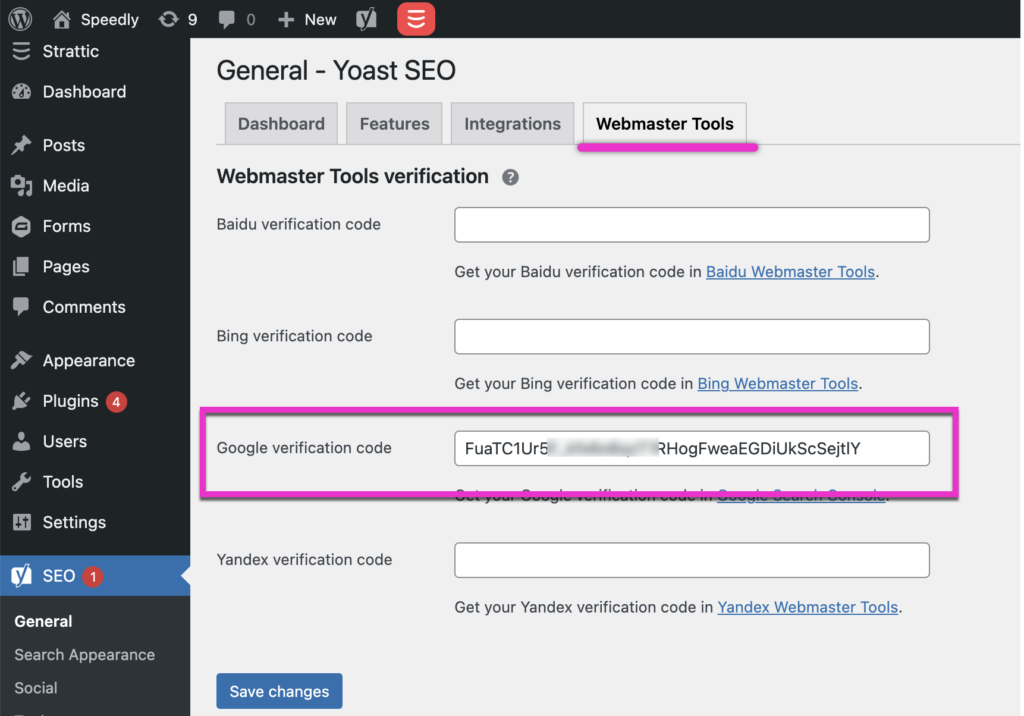
From your WordPress dashboard, we want to go to the Yoast general settings by navigating to SEO > General, then click on the Webmaster Tools tab.
Step 5:
In the Google verification code field, paste in your HTML tag and remove everything but the content key.
So this:
<meta name=”google-site-verification” content=”FuaTC1STR_kfs6o6qzT1RHogFweaEGDiUkScSejtlY” />
Would become this:
FuaTC1STR_kfs6o6qzT1RHogFweaEGDiUkScSejtlY
Now hit that Save changes button!
Step 6:
You’ll need to complete a full publish to your live environment.
Just click the Strattic button in the admin bar > Select Strattic ‘Live Environment’> then click ‘Full Publish to Live’.
Step 7:
Once your publish has finished, head back into the Google Search Console and click verify.
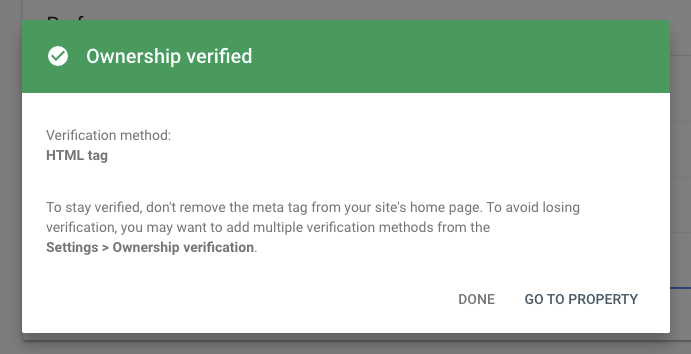
Once you see the green banner that says “Ownership verified”, you’re done!
HTML Tag Method with Rank Math plugin:
In this method, we will use the Rank Math plugin to add the Google verification code to your website.
Step 1:
Login to Google Search Console
Step 2:
Add a new property. In this case, we are going to add our live custom domain URL to the URL prefix option. We use this option as the other method would require DNS verification. Click Continue.

Step 3:
Select HTML tag from the verification methods, and copy the meta tag to your clipboard.

Step 4:
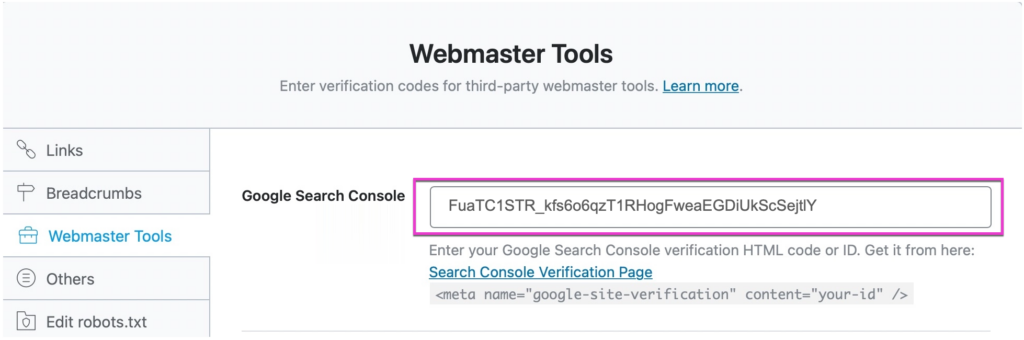
From WordPress navigate to Rank Math > General Settings > Webmaster Tools and then paste the copied code in the Google Search Console field.
Step 5:
In the Google Search Console field, paste in your HTML tag and remove everything but the content key.
So this:
<meta name=”google-site-verification” content=”FuaTC1STR_kfs6o6qzT1RHogFweaEGDiUkScSejtlY” />
Would become this:
FuaTC1STR_kfs6o6qzT1RHogFweaEGDiUkScSejtlY
Now hit that Save changes button!
Step 6:
You’ll need to complete a full publish to your live environment.
Just click the Strattic button in the admin bar > Select Strattic ‘Live Environment’> then click ‘Full Publish to Live’.
Step 7:
Once your publish has finished, head back into the Google Search Console and click verify.

Once you see the green banner that says “Ownership verified”, you’re done!