
Cloudinary automatically optimizes your website images and efficiently delivers them via multiple CDNs. Using Cloudinary will improve the site’s efficiency and user experience by reducing page load times. Everything is available inside the plugin, from media upload to image optimization, video transcoding and manipulation, and distribution via global CDNs.
In this tutorial, we will be using the free plan, this includes generous usage limits available without any time limit.
How To Set Up Cloudinary On Your WordPress Site
Step 1
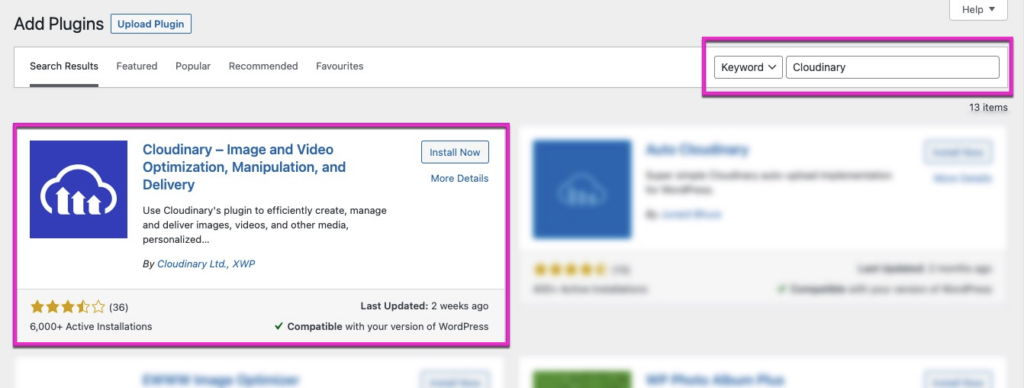
Log in to WordPress Dashboard. Go to Plugins > Add New and search for the Cloudinary plugin and then click the Install Now button, then the Activate button.
Step 2
After you’ve activated it, you’ll notice a new Cloudinary menu item in your sidebar. Click on it and it will take you to the plugin dashboard.
You will need to sign up for a free Cloudinary account before proceeding.
After creating your Cloudinary account:
-
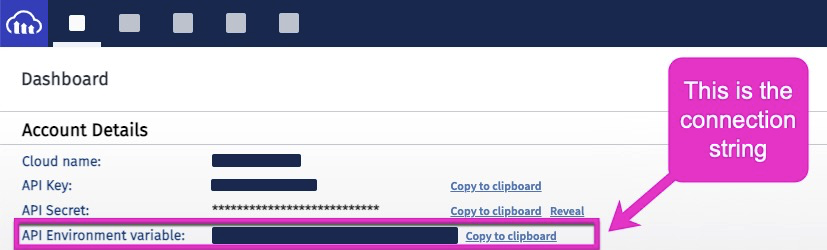
Open your Cloudinary Dashboard
-
At the top of the dashboard you will find the Account Details section
-
Copy the API Environment variable
Step 3
From the plugin dashboard click the Connect hyperlink to proceed.
Paste the Cloudinary API key (from step 2) into the Connection string field and press submit.
You should now receive a successful Connected to Cloudinary message and two further menu items will appear in the Cloudinary menu, Media Settings, and System Report.
Step 4
Cloudinary will automatically optimize any new photos you upload, but since you most likely already have images on your site, you’ll want to go to Cloudinary > Media Settings and press the Sync Now button.
Once the Sync is complete, Cloudinary will determine the most optimized resource and serve it.
eg: if a .jpg version of your image is determined to be the most optimal format they will return that instead of a .webp, .gif or .png.
Step 5
Now it is time to push your changes to your live static website.
Click the Strattic button in the admin bar > Select ‘Strattic Live Environment’ > then clicking ‘Full Publish to Live’.
That’s it! 🎉
FAQ
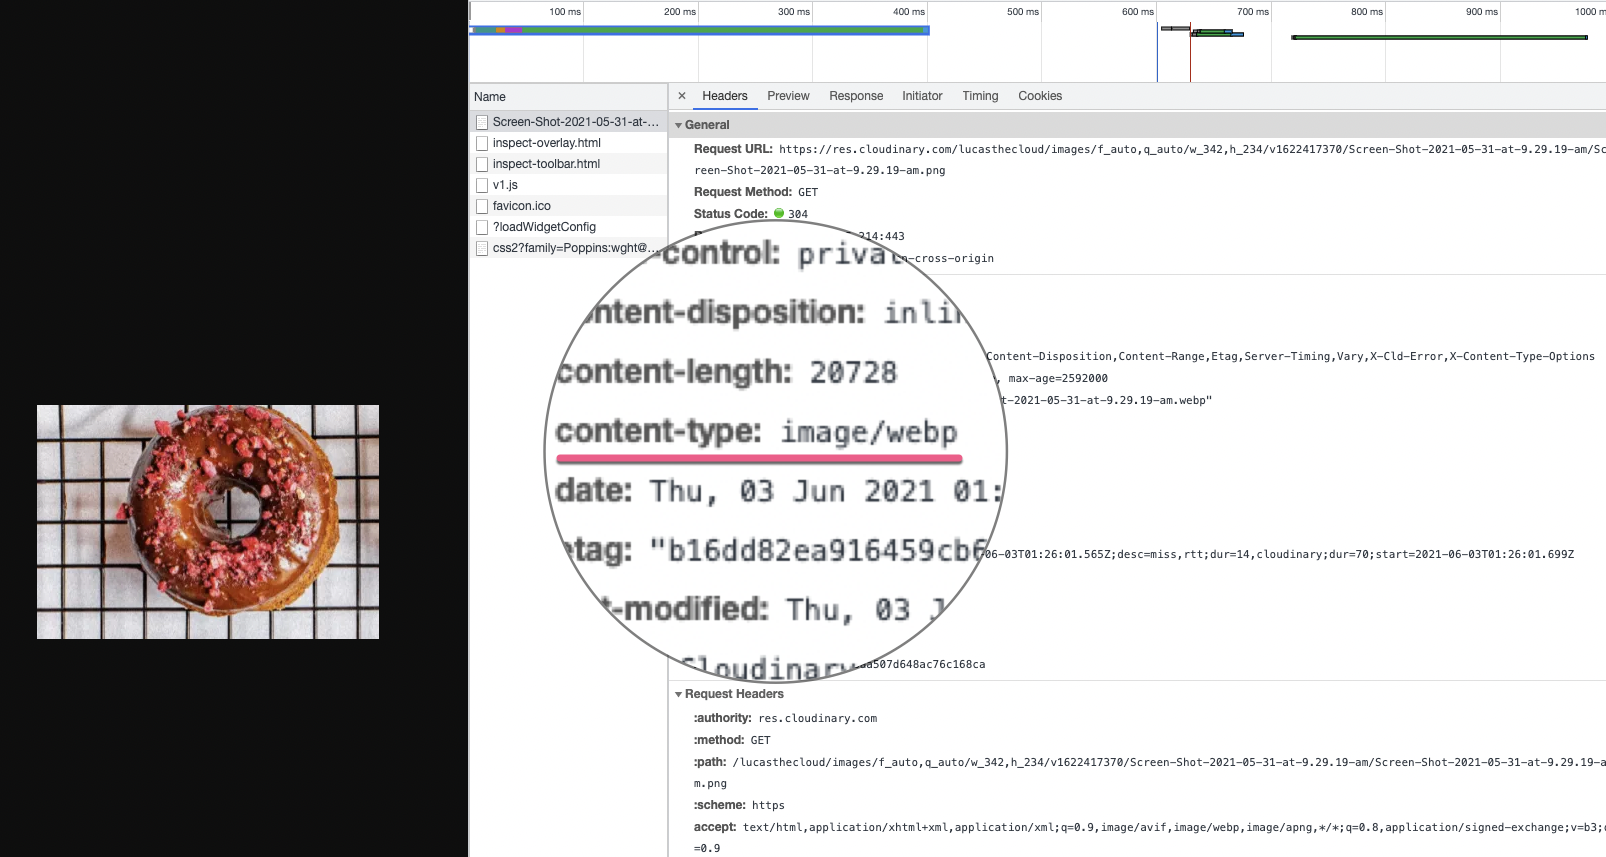
Why isn’t my image being served as a WebP?
When the Image Format setting is set to Auto the correct format that is being served is not always specified in file URL. You may find it will end with .png, but it’s actually serving a .webp. You can check the response header in Chrome Dev tools > network tab it will tell you what the content type is, and the correct image type being served.
Why aren’t my images being served from Cloudinary?
Check your media library and check the sync status of your images. If the image has successfully synced you will see a green Cloudinary logo.
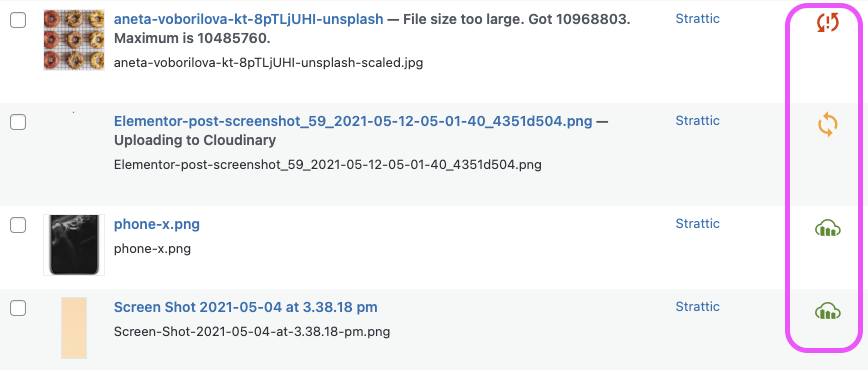
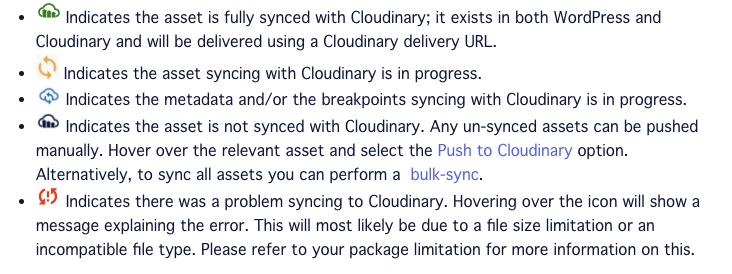
If it is something else, please see the icons status explanations below:
For further information about the Cloudinary WordPress plugin, you can see the full documentation here.