ShortPixel is a WordPress image optimization and compression plugin. It will optimize the images you upload automatically, reducing file size without compromising image quality.
ShortPixel offers 100 free image optimizations every month with no file size limitations. You’ll need to upgrade to a premium plan if you need to optimize more than 100 photos per month.
Note: Shortpixel adaptive images and Shortpixel CDN will not work on a static site.
Step 1
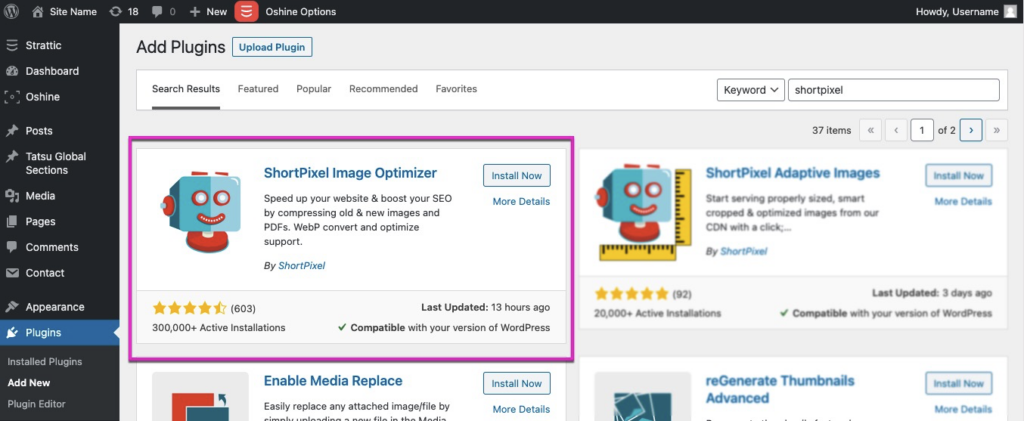
Log in to WordPress Dashboard. Go to Plugins > Add New and search for the ShortPixel Image Optimizer plugin and then click the Install Now button, then the Activate button.

Step 2
Go to Settings > ShortPixel.
a) Enter your email in the Request an API Key box and click the Request Key button. You will receive an API key via email in your inbox.
b) Copy the API key and paste it into the API Key, then click the Validate button.

Step 3
Review the general settings, and make any changes necessary. Most people will be ok with just leaving the default settings. Click Save changes.
Step 4
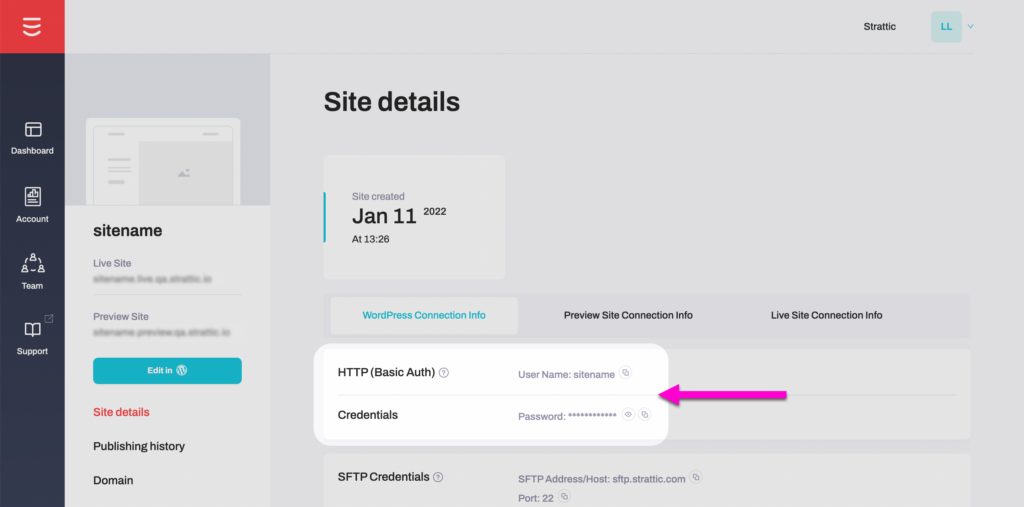
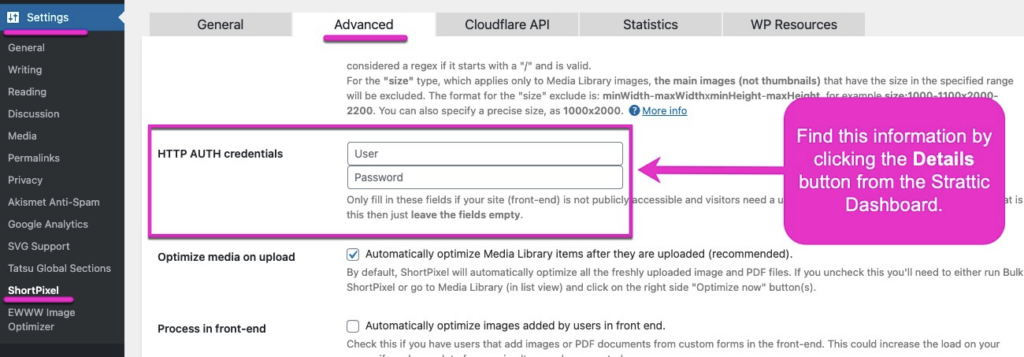
You must enter your HTTP AUTH credentials into the Advanced settings to allow ShortPixel to communicate with your Strattic hosted webpage.
a) You will be able to find this by clicking the Details button from your Strattic Dashboard.

b) from the ShortPixel settings page, choose the Advanced tab.
c) Enter in your HTTP Auth username and password.

⚠️ If you do not enter the HTTP Auth credentials, you may see the following error message when trying to optimize an image:

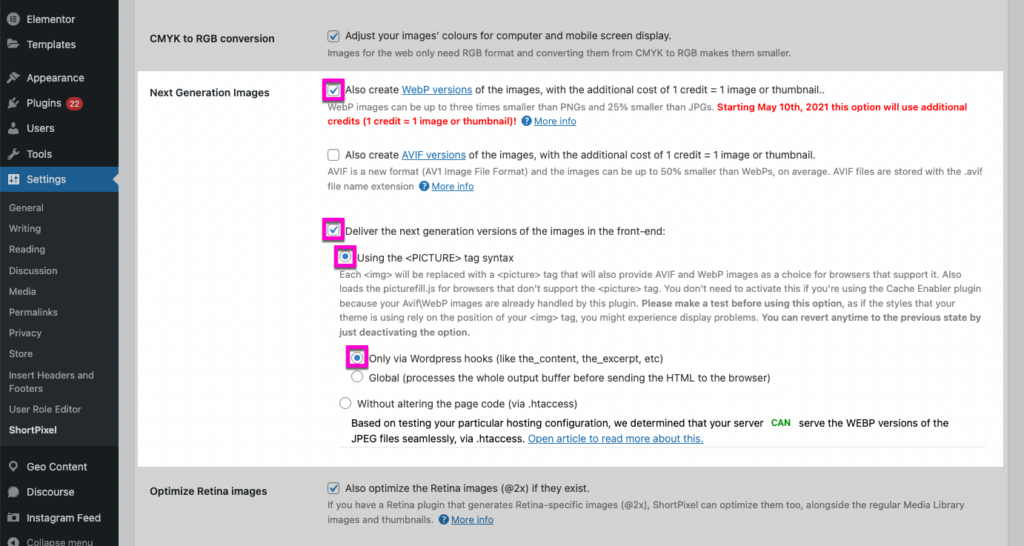
c) Select any additional advanced options that you need. If your free/paid plan allows it, I suggest using Next Generation Images.
-
Select “also create WebP versions…”
-
Select “deliver next generation versions of the images…”
-
Select “using the <picture> tag syntax…”
-
Select “Only via WordPress hooks…”
WebP is a modern image format created by Google that provides superior lossless and lossy compression for images on the web.
If the user’s browser supports WebP images, they will be displayed instead of jpg/png images. Using next-generation images is also a Google page speed rating factor, which should boost your score a few points.

d) Now, you can proceed to bulk optimize your existing images.
Click Save and Go to Bulk Process.
Step 5
Click Start Optimizing. After you start the bulk process you must keep the page open and your computer running in order for the optimization to run. If you close the page for whatever reason, just turn back to it, and the bulk process will resume.

Step 6
After you have optimized your existing library, your subsequent uploads will be automatically optimized. If you are happy with the results, do a Full Publish to your static site.
That’s it! 🎉