StoryChief is a content marketing solution that helps you manage your WordPress blog, social media posts and more all in one place.
You will need to follow these steps in order to connect StoryChief to Strattic.
Please Note:
For this integration to work, your WordPress container must be online and not asleep. You can ensure your site is online by pressing the Edit in WP button from the Strattic dashboard.
Step 1.
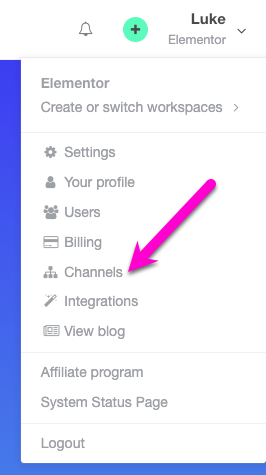
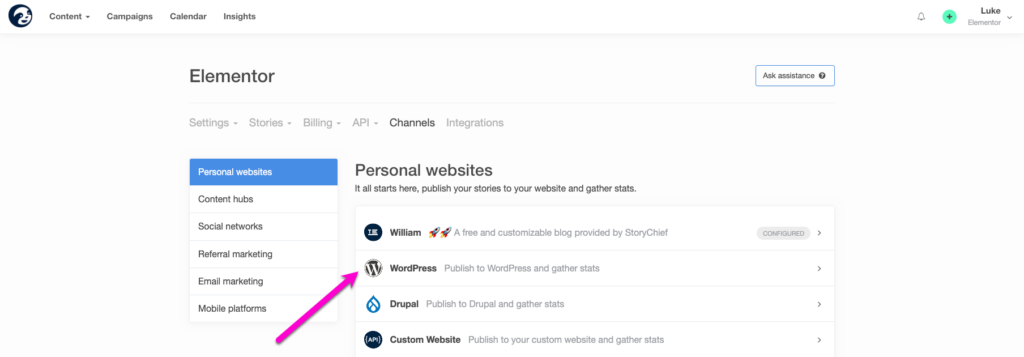
From your workspace dropdown menu in your StoryChief dashboard click on Channels, followed by WordPress.
Step 2.
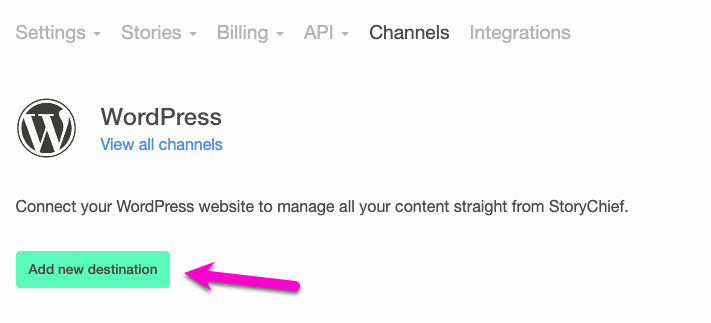
Click on Add new destination to begin the setup procedure. Leave the following page open.
Step 3.
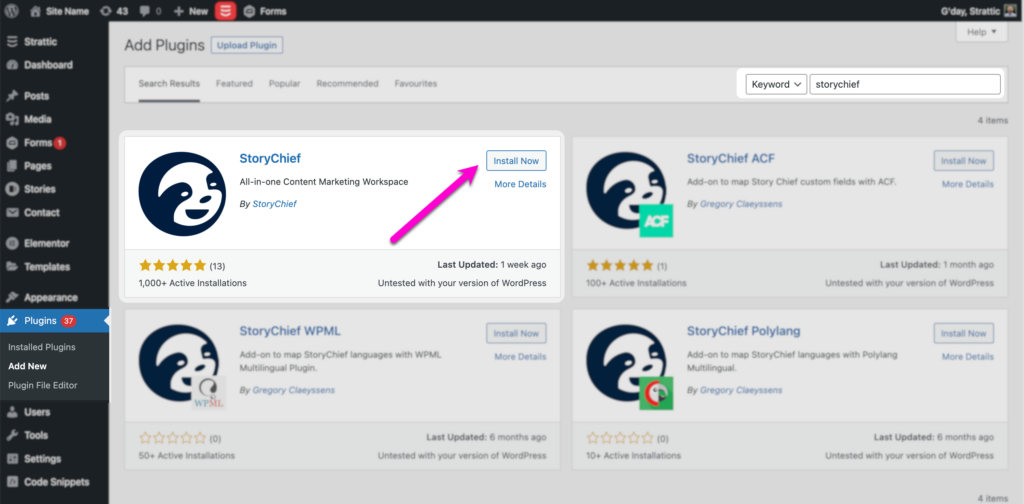
On your WordPress website, install the StoryChief WordPress plugin. You can do this from your WordPress dashboard by navigating to Plugins > Add new and searching “StoryChief”. Click Install Now. Once installed click Activate.
Step 4.
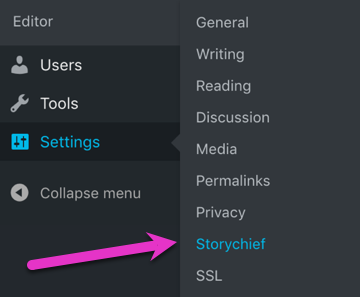
In your WordPress Settings menu, click on StoryChief.
Step 5.
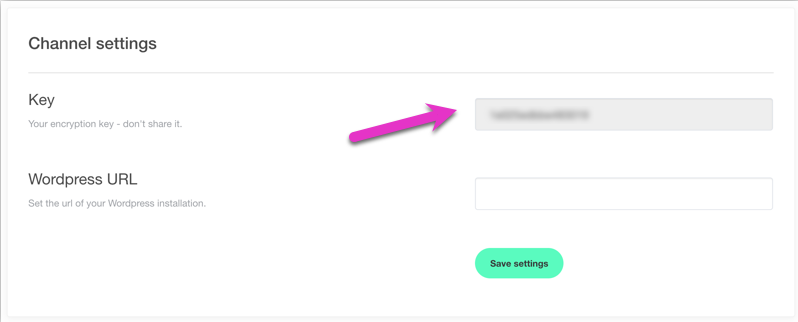
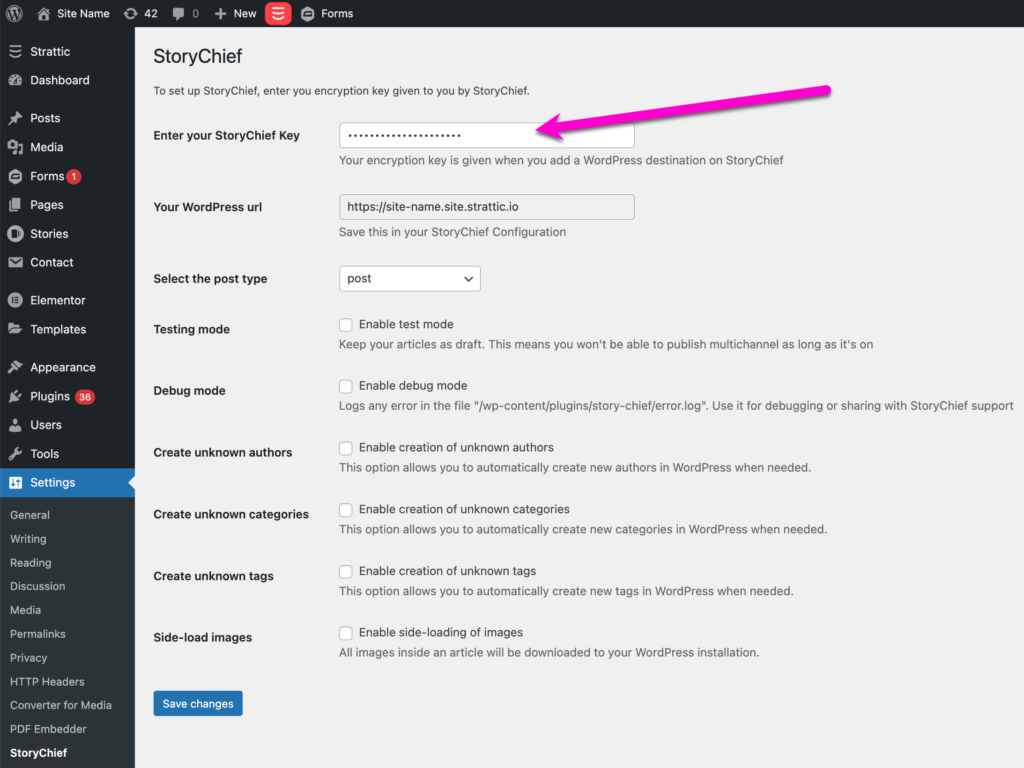
Copy your unique key from your StoryChief account (from step 2) and paste it into the settings page of the StoryChief plugin.
Step 6.
From Strattic dashboard > Site Details find your WordPress URL and HTTP (Basic Auth) Credentials.
You will need to enter these into the WordPress URL field on your StoryChief account (from step 2).
The URL should look like this:
https://username:password@your-site-name.site.strattic.io
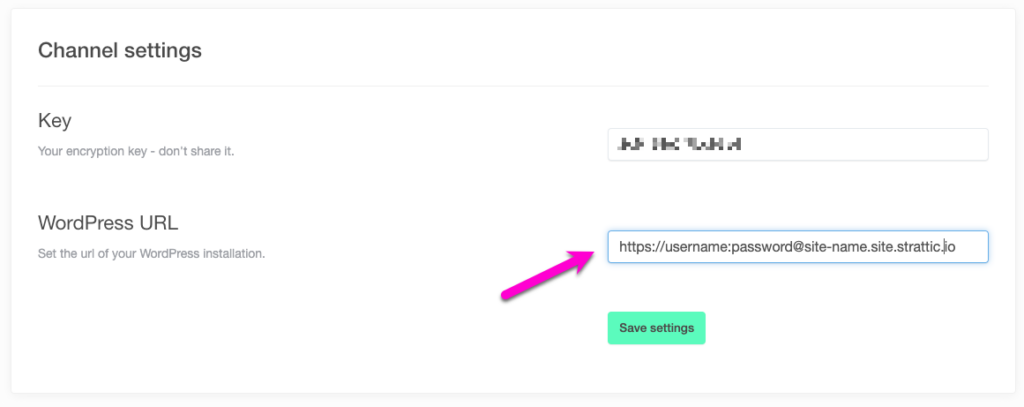
Now both StoryChief and the WordPress plugin should have a key and URL.
Step 7.
Now that StoryChief is connected to your WordPress site, it will be possible to publish content from StoryChief to your WordPress site. Any changes to your WordPress site would then need to be published manually to your preview or live environments using the Strattic publish button.
Developers:
If you’d like to customize your StoryChief Publish, you can check out the code sample here.