Omigosh, Zapier is amazing! It lets you connect practically any web service to any other web service. It seriously feels like magic.
On static sites, forms typically wouldn’t work, but Strattic has built support for one of the most popular WordPress form plugins, Gravity Forms. And now, you can send form submissions to practically anywhere via Zapier.
Here are some ideas for what you can do with the Strattic Gravity Forms integration with Zapier:
-
Someone fills out a Gravity form on your site and you want to send that to a Google Spreadsheet? Zapier to the rescue!
-
A lead fills out a Gravity form on your site and you want to send that to Mailchimp? Zapier can help with that!
-
Gravity Forms to Hubspot or Salesforce? Zapierrrrrr!
You get the idea 😄
Watch the Video (Or Keep Reading Below)
Let’s get started!
Requirements:
-
Gravity Forms license
-
Zapier paid account
Here’s how to connect your Gravity Forms to Zapier when you’re hosting on Strattic:
1. Create a form with Gravity Forms by following Strattic’s step by step guide
2. Go to your Zapier account (or create a new one)
3. Create a Zap
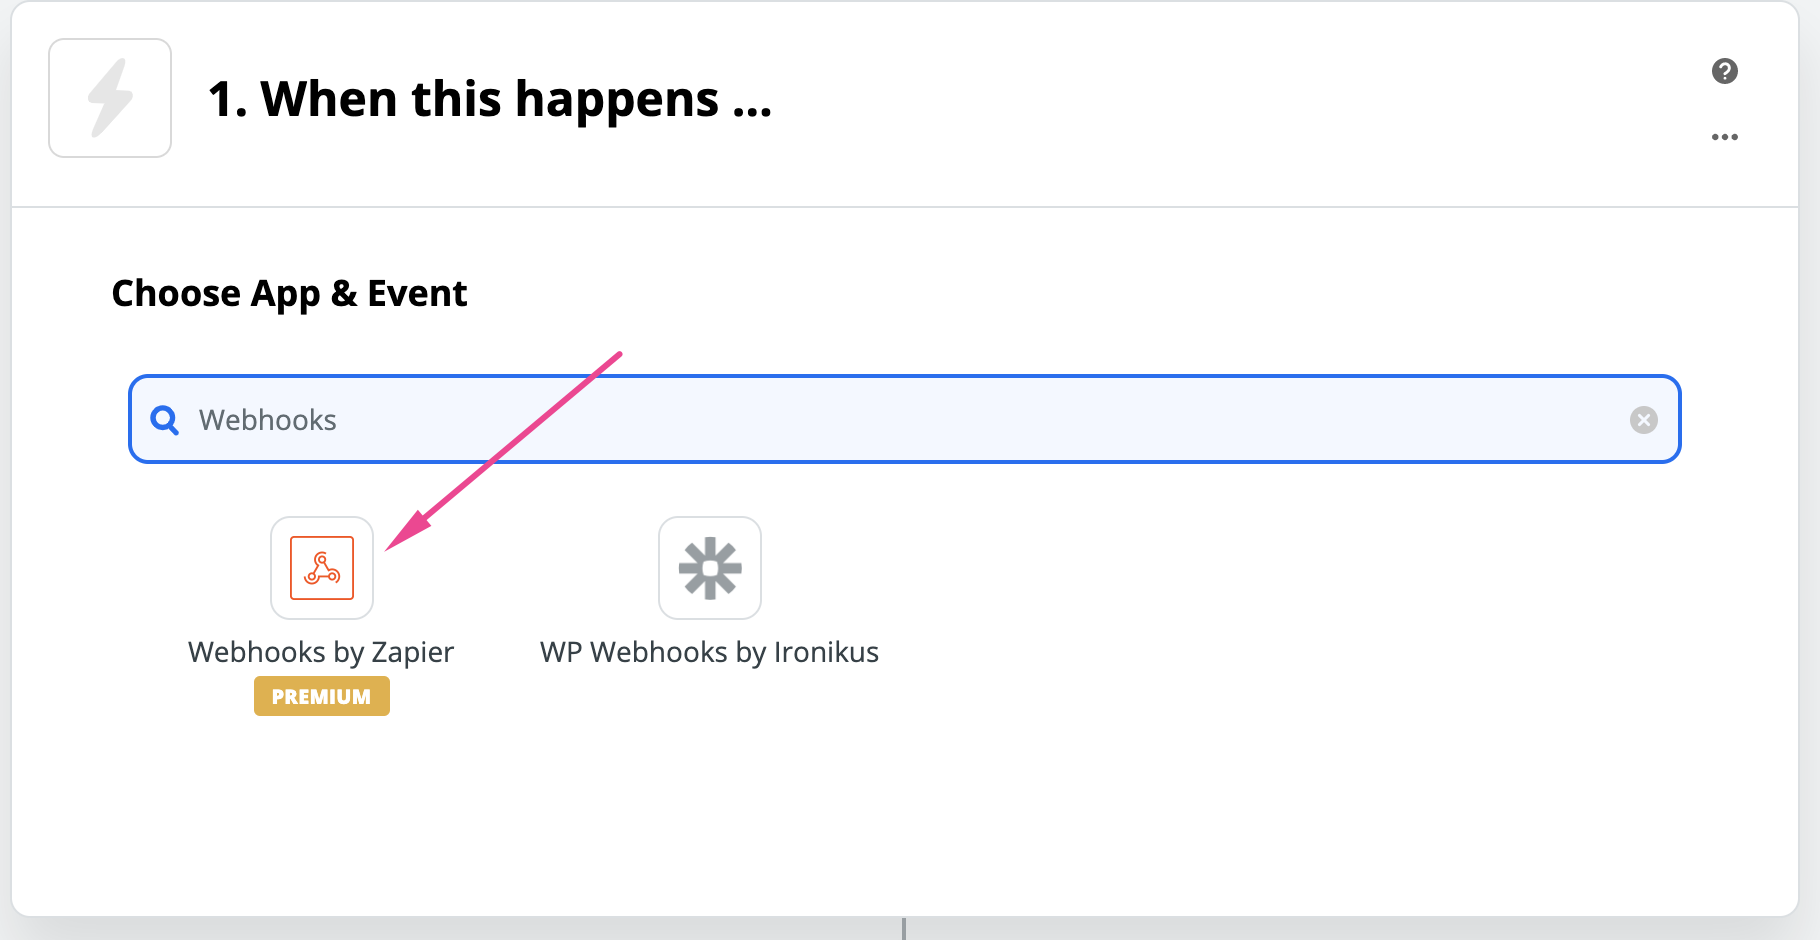
4. Search for Webhooks (available for paid plans) and select “Webhooks by Zapier”
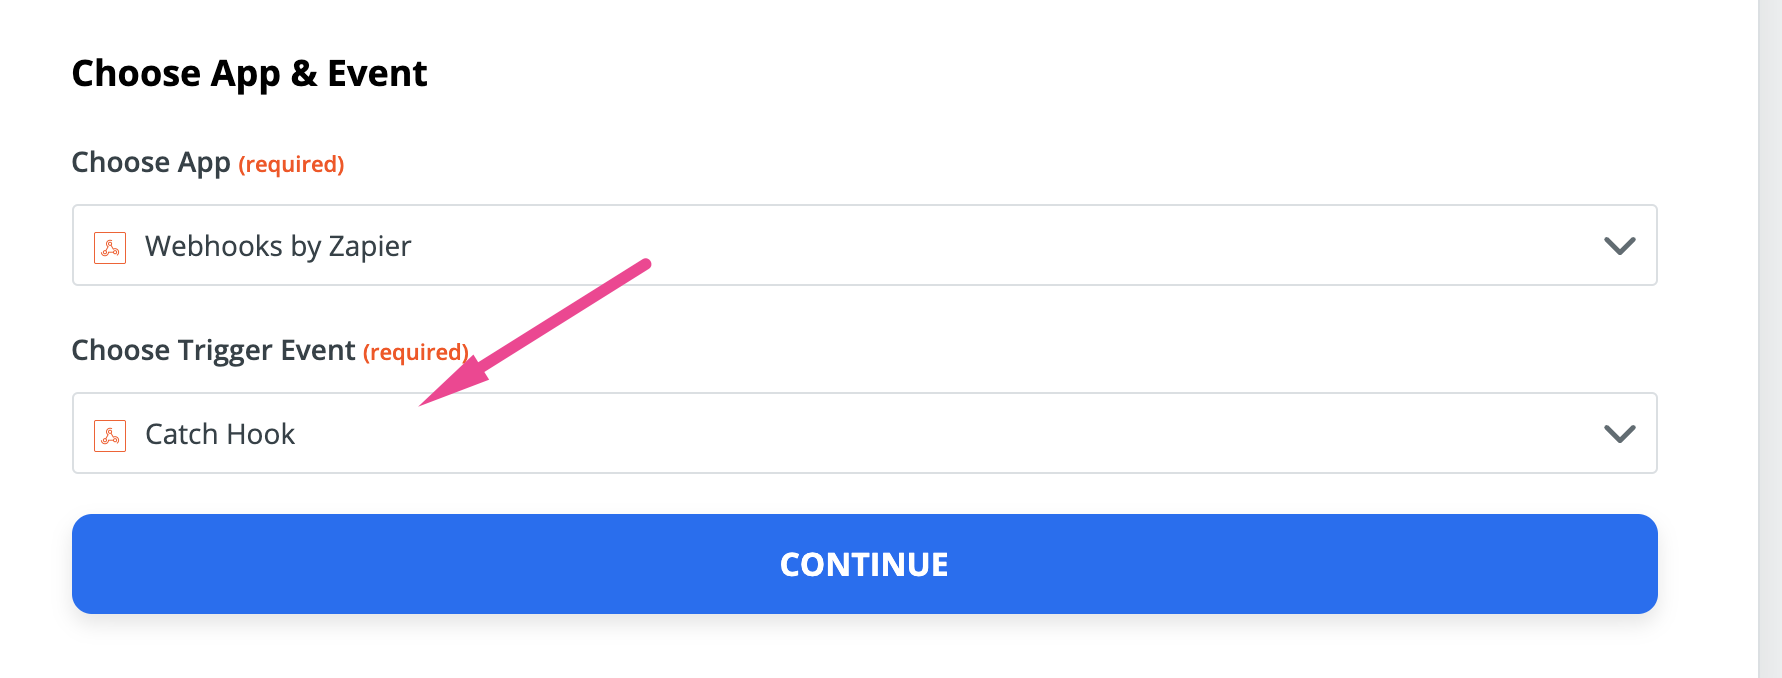
5. Next, for “Choose Trigger Event”, select “Catch Hook” and click Continue.
6. Next, for Customize Hook, copy the Custom Webhook URL

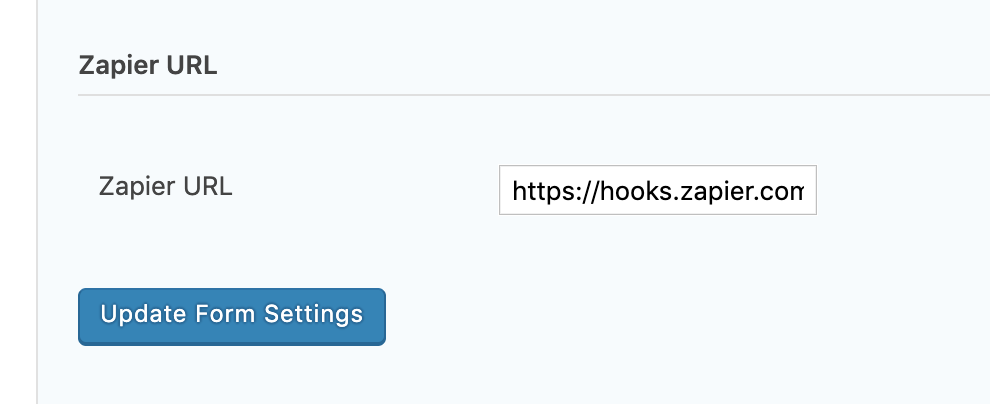
7. Go back to your WordPress site and go to your Gravity Form > Form Settings and paste the Custom Webhook URL. Click “Update Form Settings”.
8. Go to your Gravity Form (either in WordPress or on the published static site) and fill in the form with test data and submit it. Zapier needs this step in order to receive a sample submission so you can map the fields as needed.
9. Go back to Zapier, click Continue
10. Click Test Trigger
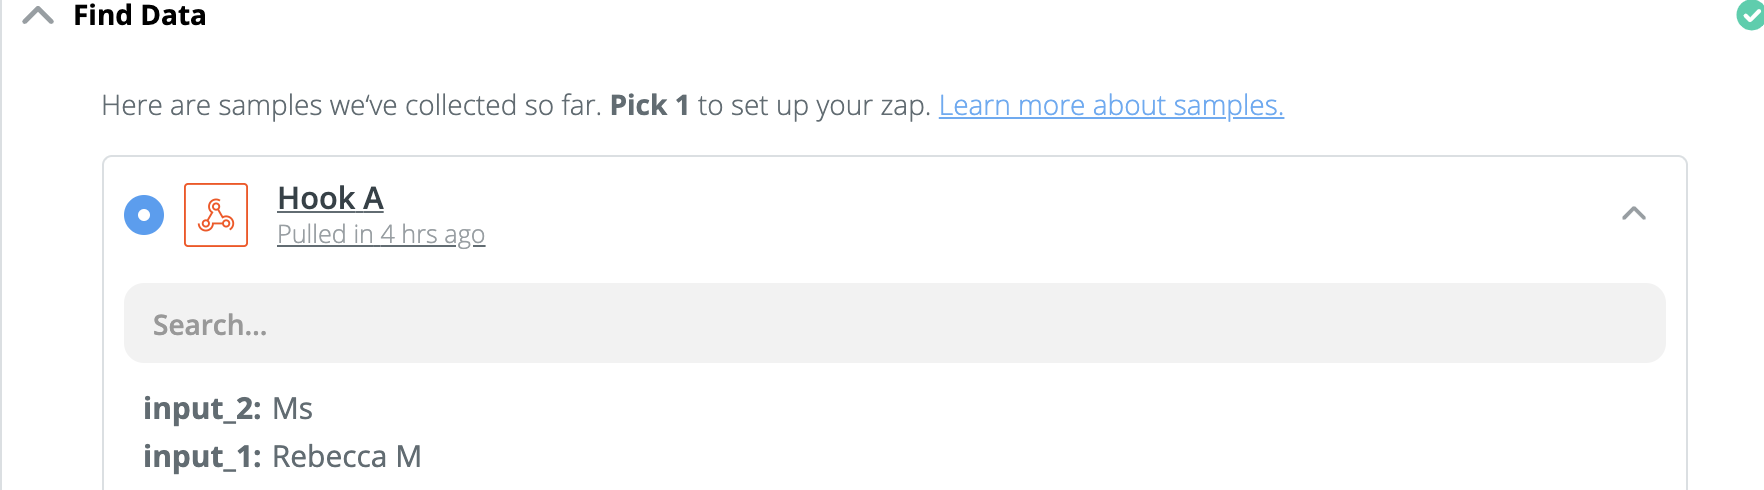
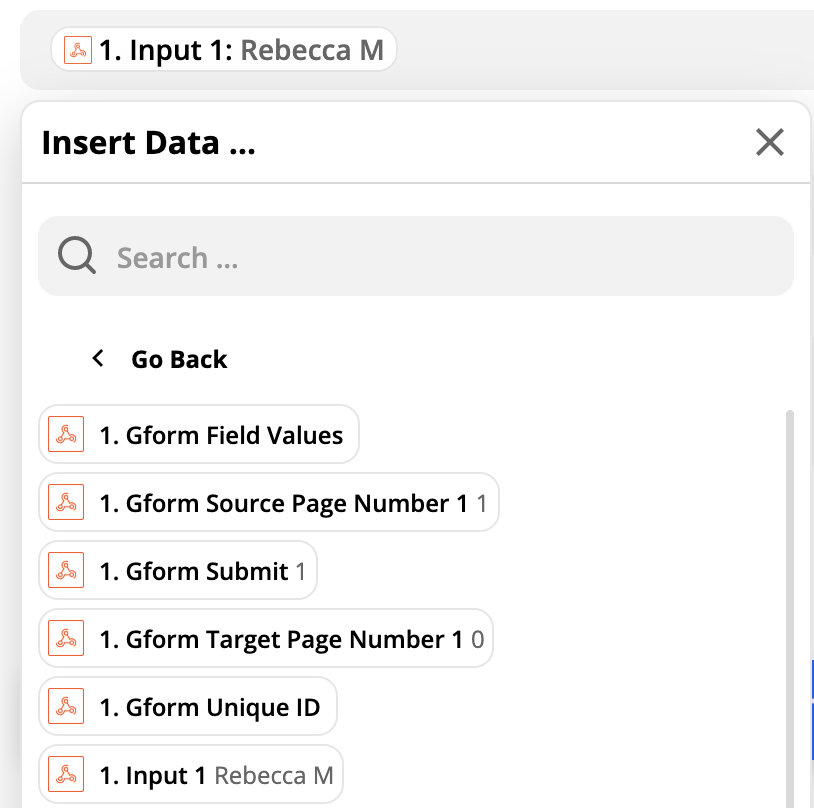
11. You should see the latest form submissions from your Gravity Form in Zapier:
12. Click Continue
13. Select another service to connect to (Mailchimp, Hubspot, Google Sheets, etc)
14. Map the data from your form submission inputs to the web service you’re zapping
to. For example, I connected my form to Google Sheets and mapped “Input 1” from Gravity Forms to “Name” in my Google Sheet:
15. Turn your Zap On
16. Go back to your WordPress site and click on the big red Strattic publish button then click ‘Full Publish’ to generate a static version of your WordPress site.
17. Then test the Gravity Forms to Zapier functionality on your static site!
Optional: Webhooks can be used to trigger multiple Zaps
You can combine multiple webhooks into a single URL if you want to run them from the same event in your app. For example, if you have three Zaps, the URLs would look like this:
https://hooks.zapier.com/hooks/catch/123456/zbB61
https://hooks.zapier.com/hooks/catch/123456/kzXC4
https://hooks.zapier.com/hooks/catch/123456/2Ajjn
This can be done by taking the last portion of each URL and combining them into one:https://zapier.com/hooks/catch/123456/zbB61,kzXC4,2Ajjn
Requests sent to this URL will trigger all three webhook URLs at once.