Git is used to track changes to files so you can have a record of what was changed, and you can revert to a previous version if something goes awry. Git also makes it easier to collaborate with other developers allowing several people to merge their code into a single codebase.
After you make changes to the files, you’ll need to deploy those changes to your website.
In order to deploy a code repository on Strattic, we recommend using a tool like DeployHQ. This allows for the repository to be deployed via SFTP. Tools like DeployHQ track your commits and run a script to move your code from the repository to the server.
This is very nice, no more clicking and dragging files via your SFTP client 👍 😎 .
This tutorial assumes you know how to use Git and repositories to track your code changes.
Recommendations and Best Practices
Before we get started with the setup, we have a few recommendations and best practices to keep in mind when integrating your repository and Strattic’s platform:
-
DO NOT overwrite or track your wp-config.php file!
This file contains Strattic configurations, your database passwords, salts, and other configurations. It should NOT be overwritten or exposed in a repository. -
Make sure you’re using a Strattic-compatible .gitignore file:
– You should probably have the .gitignore file in the WordPress root directory (where the wp-admin, wp-content, wp-includes directories are).
– This gist is an example to ignore WordPress core files.
– As an alternative, this gist is more strict and will only track changes in the mu-plugins, plugins, and themes directories of your wp-content directory.
– If you are using any “mu-plugins”, make sure you are tracking the mu-plugins directory. If not, it can be ignored (just make sure to ignore the ludicrous directory and the strattic.php files in your .gitignore, since these should not be changed or removed).
-
Only deploy code to Strattic, not your entire WordPress instance. This includes files like images, PDFs, etc.
-
The main files for version control are going to be in wp-content, which includes the mu-plugins, plugins, and themes directories. Any other code files or folders that need to be tracked can and should be added to the wp-content directory.
-
Since you’re deploying from a repository, make sure you’ve got a good workflow down for creating changes like adding posts, images, or updating styles and functionality. A solid way to think about this is:
– Code goes “up” (to the WordPress site) in your deployment from the repository to WordPress site. For example, if you want to install a theme or plugin, you should first add the code files to your repository, then deploy those changes to the site, and activate the plugin via the WordPress dashboard.
– Content (images and database) go “down”, to your local environment, from your staging WordPress site. Since you can’t really “pull” from your site to your repository, you may need to download a backup of your site from the Strattic dashboard or use a free migration plugin like Migrate Guru. If you would like to continuously pull down your database, another solution would be to set up WP Migrate DB Pro (a paid plugin) on your staging and local sites, pulling down your database and media files with the Media File Add-on (a paid add-on).
Again, these are all just recommendations, and you know your site best.
If anything goes wrong, we always have a daily backup of your site which you can access in your Strattic Dashboard #safetyfirst🤓 .
Ok, let’s get going!
Set up DeployHQ to deploy your Local code to the Production server
To follow along with the rest of the tutorial, you’ll need:
-
A Git repository on Github, Gitlab, Bitbucket, or self-hosted
-
An account on DeployHQ (On the free tier, you can deploy 1 project up to 10 times a day!)
-
Your site’s SFTP credentials, which can be found in your Strattic Dashboard
Sign Up for a Free DeployHQ Account
If you haven’t already, go to DeployHQ and create a free account. You’ll get an email to verify your email address, make sure you verify your email or you won’t be able to move on to the next step or deploy.
Already have an account? Make sure you sign in.
That was fast! On to the next step!
Set Up a DeployHQ Project
If you’ve just signed up for DeployHQ, you were probably greeted with a “Create a Project” button:
If you already have an account or got lost along the way, you can always go to your DeployHQ Dashboard or Projects tab and click “Create a Project” or “New Project”.
Once you do that, you’re greeted with the following:
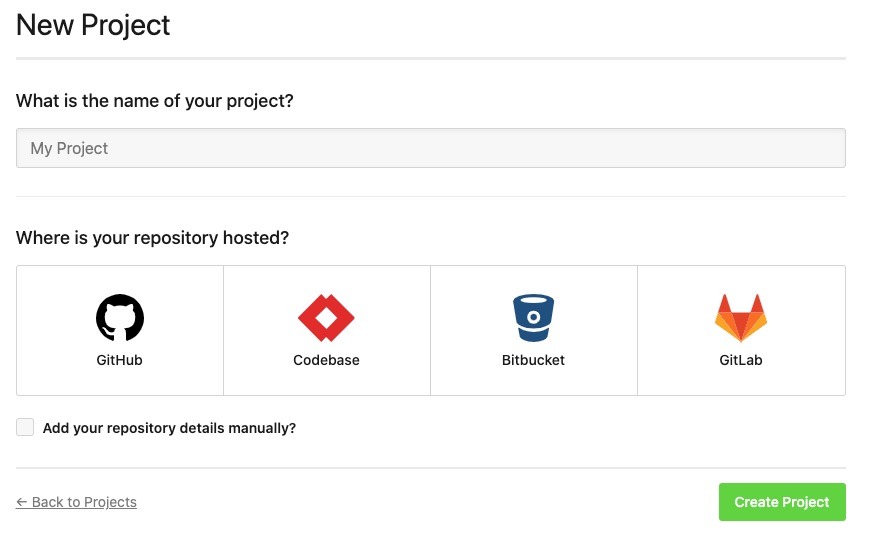
Add a new name for your project, like “My Awesome Strattic Site”.
If your repository is on one of the listed services, you can click on the service and authenticate yourself. You will then be able to choose the repository you want to integrate on DeployHQ.
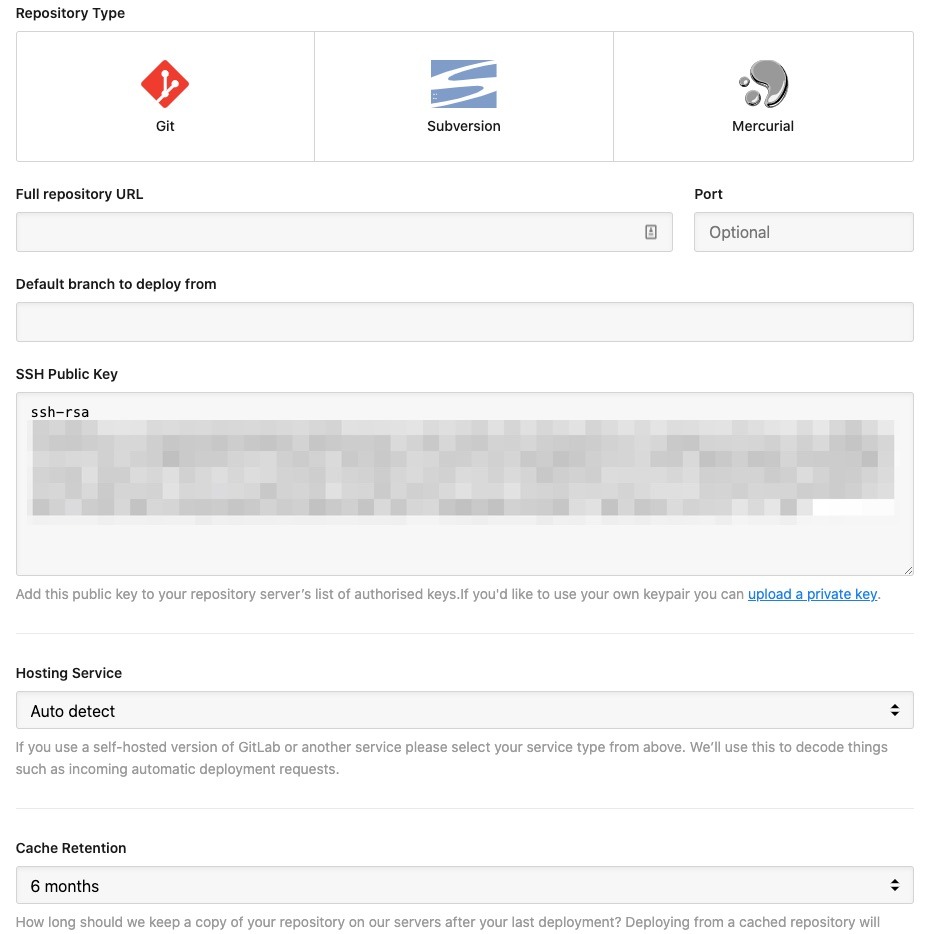
Alternatively, if you’re self-hosting your repository or the service you use is not listed, you can check “Add your repository details manually?”.
If you do add your repository manually, you’ll be greeted with and need to add the following details to your repository and to DeployHQ:
Otherwise, you can authenticate and search for your repository
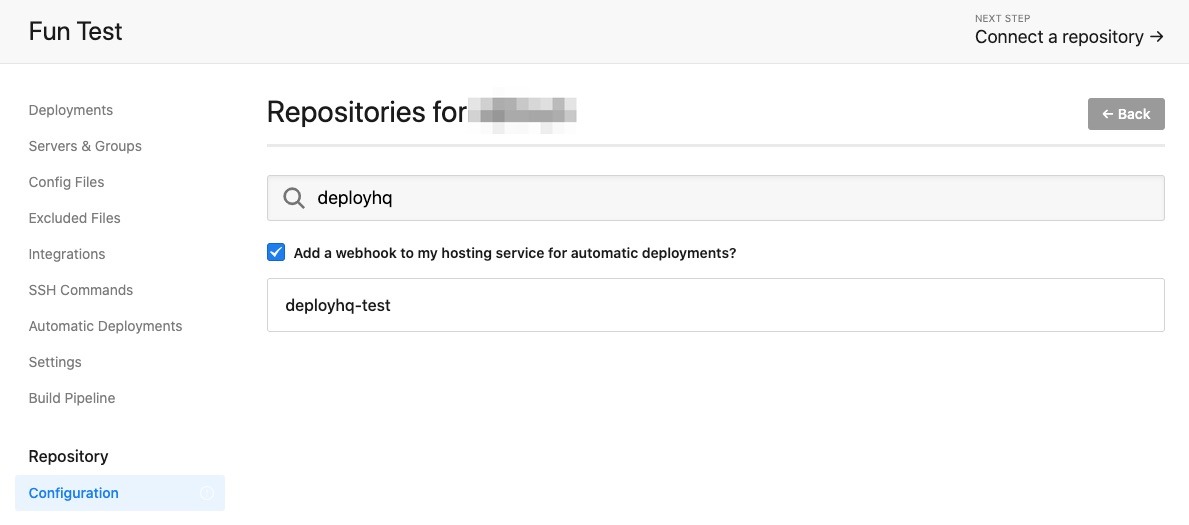
Once you locate the repository you want to deploy, click it. DeployHQ will authorize it, add its deploy keys, and then take you to the “New Server” setup.
To set up the server, you’ll need your SFTP credentials from your Strattic Dashboard. Once you’re in the dashboard, click the “Details” button of the site you want to integrate.
From there, under the “WordPress Connection Info” tab, you can get your SFTP credentials:
Set Up Your DeployHQ Server
Now it’s time to set up your DeployHQ server. You should see a screen like this:
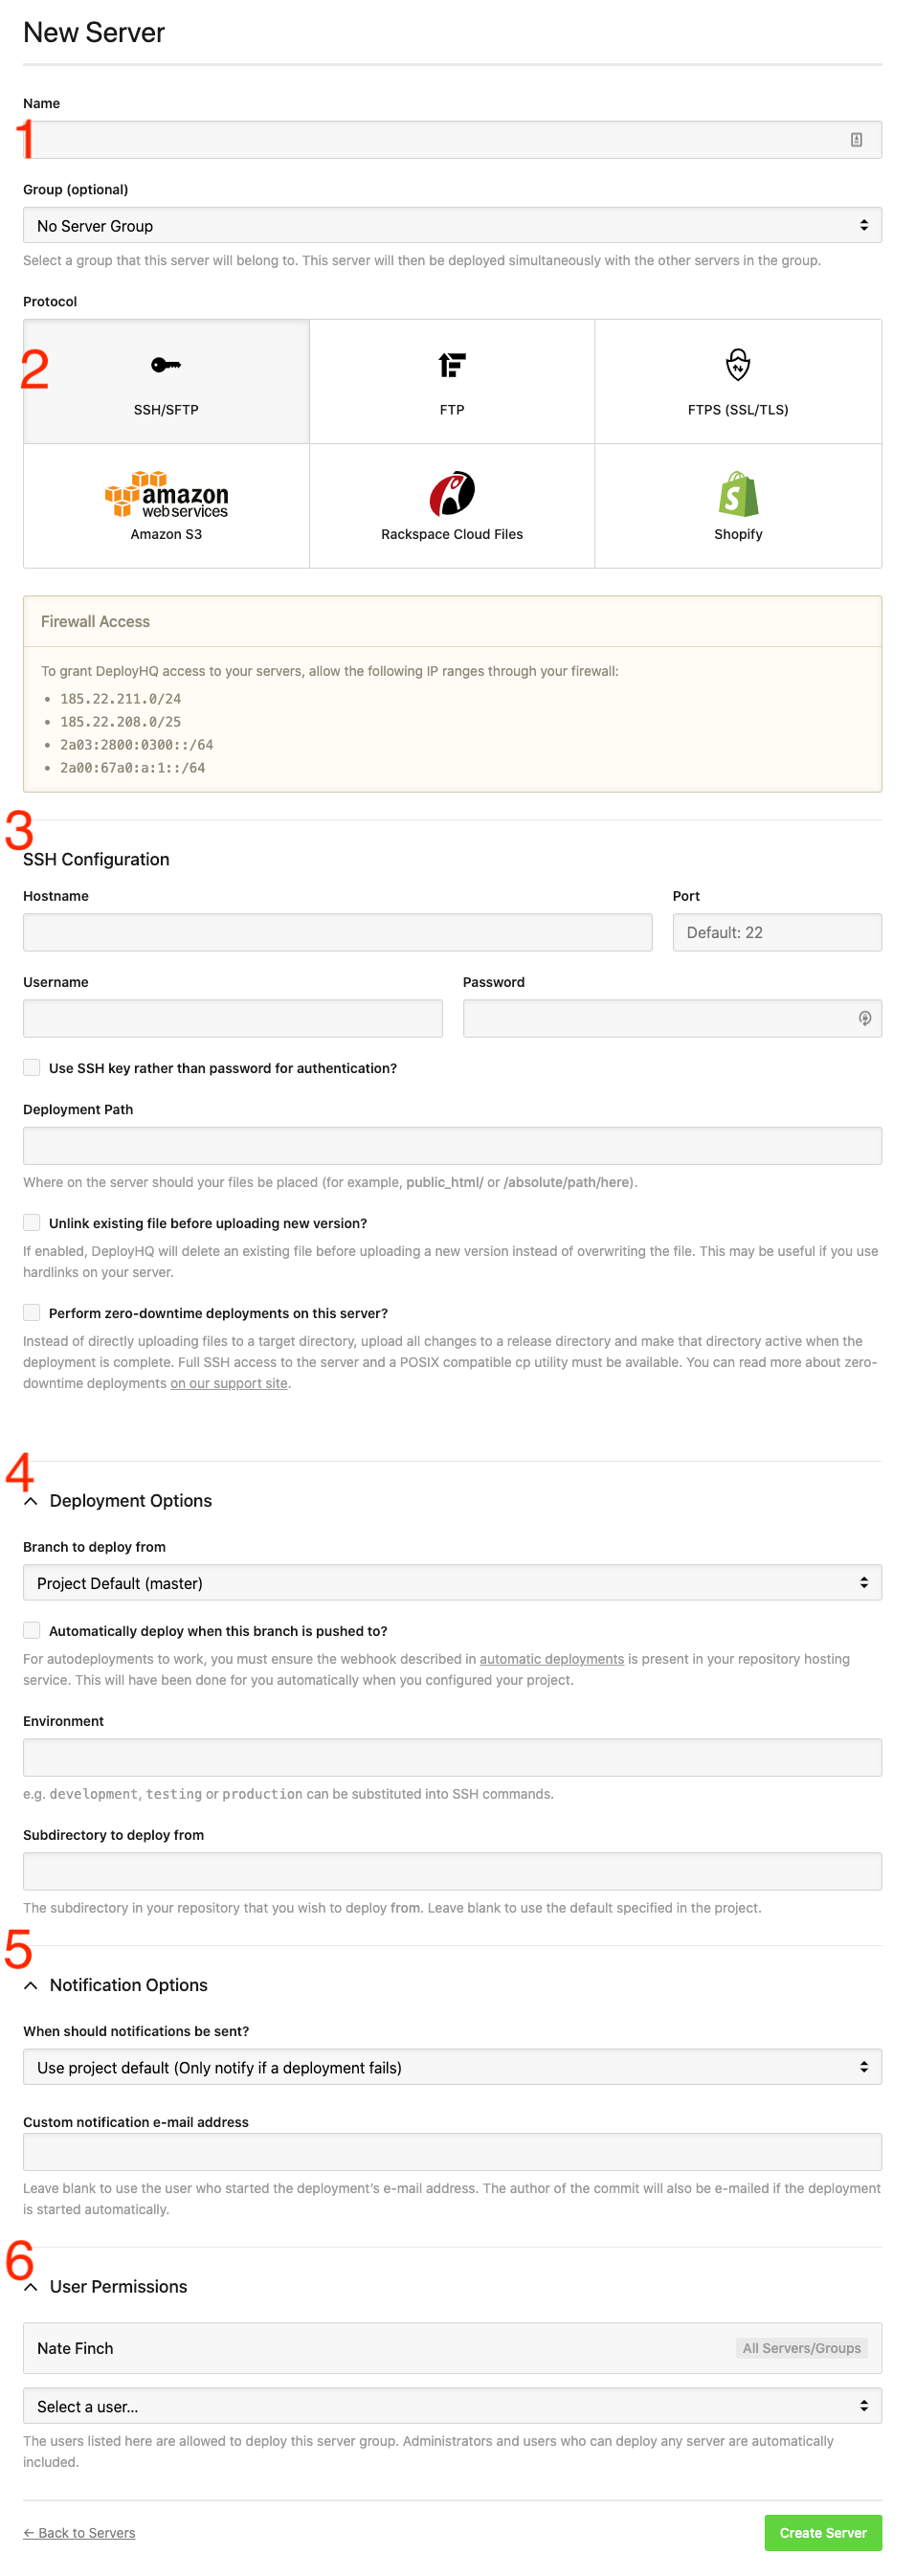
In order to set up the server you’ll need to do the following:
Step 1.
Name the Server (something like “Live Strattic Deployment Server”).
Step 2
Click on the SSH/SFTP button.
Step 3
Under SSH Configuration, input the following from your Strattic SFTP credentials:
a. “Hostname” is the value from “SFTP Address/Host”.
b. “Port” is the value from “Port”.
c. “Username” is the value from “User Name”.
d. “Password” is the value from “Password”.
e. Leave “Use SSH key rather than password for authentication?” unchecked.
f. In “Deployment Path”, input /public_html, this assumes your repository is based in the WordPress root as mentioned above.
g. Leave the “Unlink existing file before uploading new version?” and “Perform zero-downtime deployments on this server?” boxes unchecked.
Step 4
Under Deployment Options
a. Select the branch to deploy from (“master” is default, but you can select any branch)
b. If you would like the branch to automatically deploy when pushed to, you can check the “Automatically deploy when this branch is pushed to?” box.
c. Label the Environment whatever you like, e.g. “Production”.
d. Unless you have a custom deployment situation, you can probably leave “Subdirectory to deploy from” blank.
Step 5
Under Notification Options:
a. You can select when notifications should be sent. To start, we recommend “Always Notify” while you’re getting comfortable with DeployHQ, otherwise you can always leave it on the “Only notify if a deployment fails” option.
b. If you do want to receive notifications, enter your email address.
Step 6
Under User Permissions:
Currently, you probably do not need to change this. However, if you build out multiple deployments and projects with a larger team, these options allow you to select who has permission to deploy.
Now, click “Create Server”. If there are any errors, you can fix them or reach out to DeployHQ’s support for help and guidance.
Once the server is created, you’re ready for deployment.
Run Your First Deployment Manually
You’ll want to run your first deployment manually. The rest can be done automatically when code is pushed to whatever branch you indicated in the deployment server settings.
To make a deployment, click on “Deployments” and then the “New Deployment” button or “Deploy Project” button, either will take you to the same manual deployment screen.
From here, you can see the following:
-
Deploy Limit: if you’re on the free plan, you have 10 deployments a day you can use.
-
Servers: this will list the Server you set up in the last step, or any other servers you have available to deploy.
-
Branch: the selected branch you want to deploy from. This can be changed if there is more than one branch.
-
Start Revision: if you’ve deployed before, this will show the last commit DeployHQ deployed. You can choose a different commit or enter one manually.
-
End Revision: this will show the most recent commit that DeployHQ will deploy. You can choose a different commit or enter one manually.
-
Schedule Deployment: this allows you to run the deployment immediately or schedule it to deploy in the future.
Once you’re satisfied with the options, you can “Preview” or “Deploy”.
“Preview” will allow you to see what will be deployed and if it will most likely succeed.
“Deploy” will deploy the commit/s and you’ll be able to watch the progress. If there are any issues, please check your logs, reference DeployHQ’s Help and Support, and feel free to reach out to us as well.
Note: Depending on the size of your repository, your first deployment may take some time to complete. Subsequent deployments should go much faster and they’re only deploying the changes you made in the code.
And finally, once everything looks good on the WordPress site, you can publish your changes to the static site by clicking the big red “Strattic Publish” button.
Further Resources
If you need more information, you can find help here or contact DeployHQ for more information.