If you’d like to start using Cloudflare as your DNS provider:
Step 1a.
Create a Cloudflare account here
Step 2a.
Add your domain
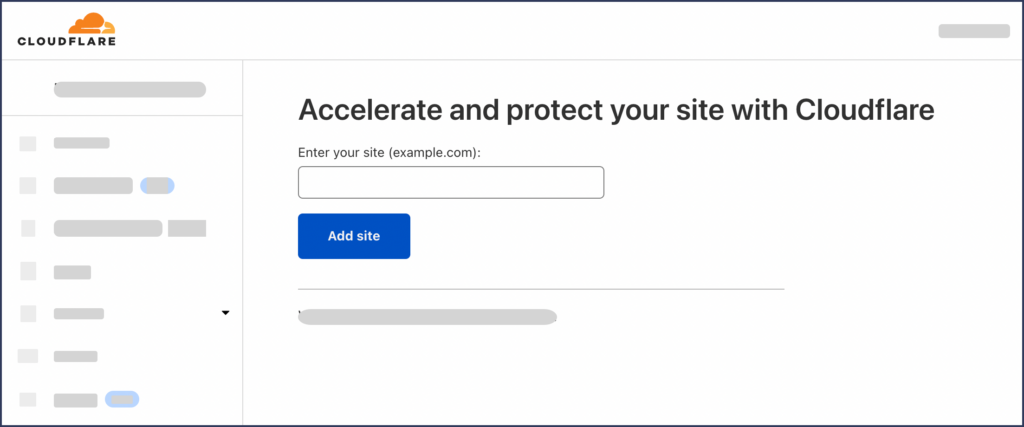
Step 3a.
Select the free plan
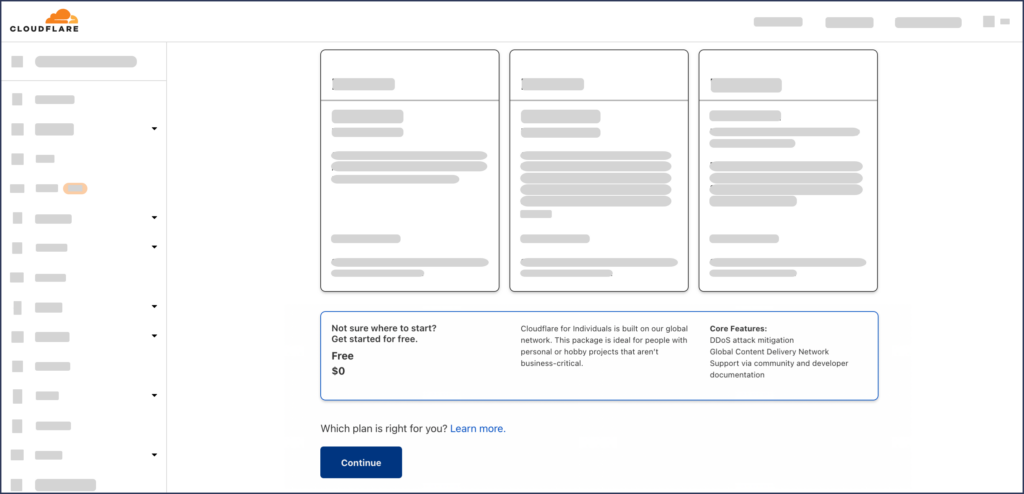
Step 4a.
Cloudflare will perform a quick scan to pull in your existing DNS records which is pretty sweet since it saves you an extra step of copying in your DNS records manually.
Verify that DNS records below are configured correctly, then press Continue.
Step 5a.
Cloudflare will present you with NS records which you’ll need to add to your domain registrar (e.g. GoDaddy, name.com, etc)
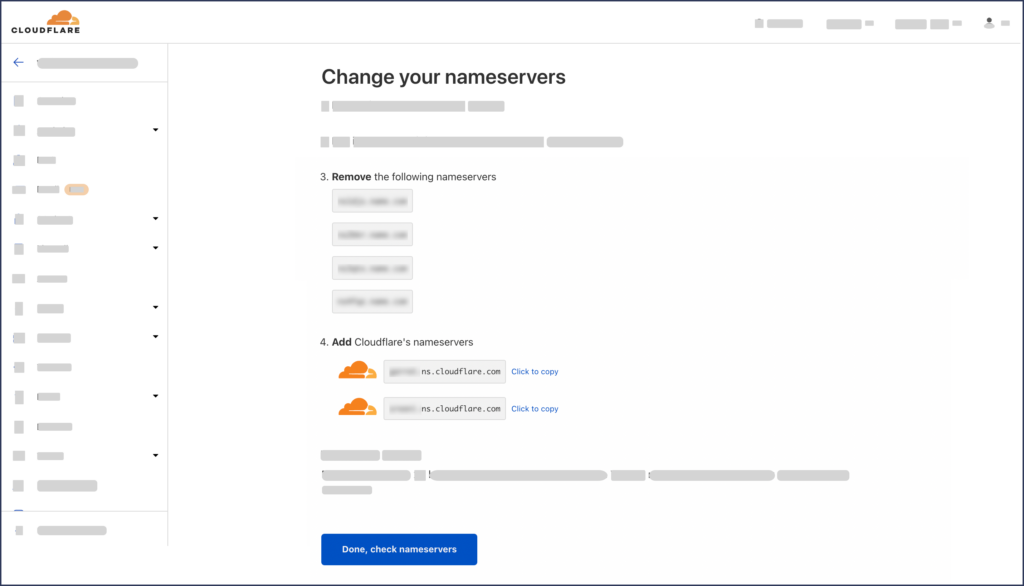
PLEASE NOTE: If your email is configured through your DNS records, this step will likely result in a few minutes of downtime for your email.
Step 6a.
Cloudflare then leads you through a few optimization questions – you can leave all the defaults.
How to set up a “www” domain on Cloudflare
(e.g. https://www.yourdomainname.com)
Step 1b.
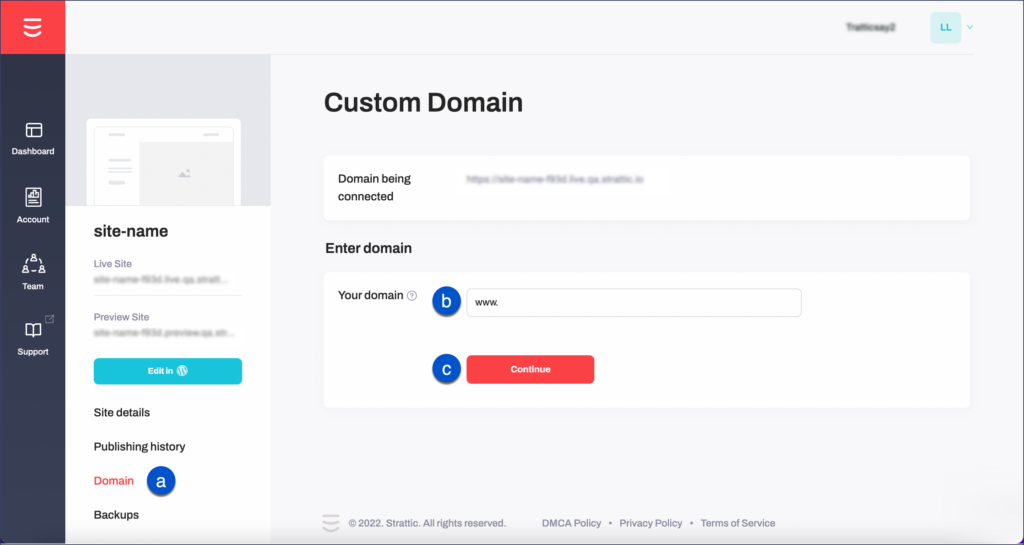
In your Strattic Dashboard, go to your site, and then click on “Details”
Step 2b.
a) Click “Domain” from the menu
b) Enter your custom domain (i.e. www.yourdomainname.com)
c) Click “Continue”
Step 3b.
You’ll see a CNAME record displayed. This is used to verify domain ownership so that the SSL certificate can be generated.
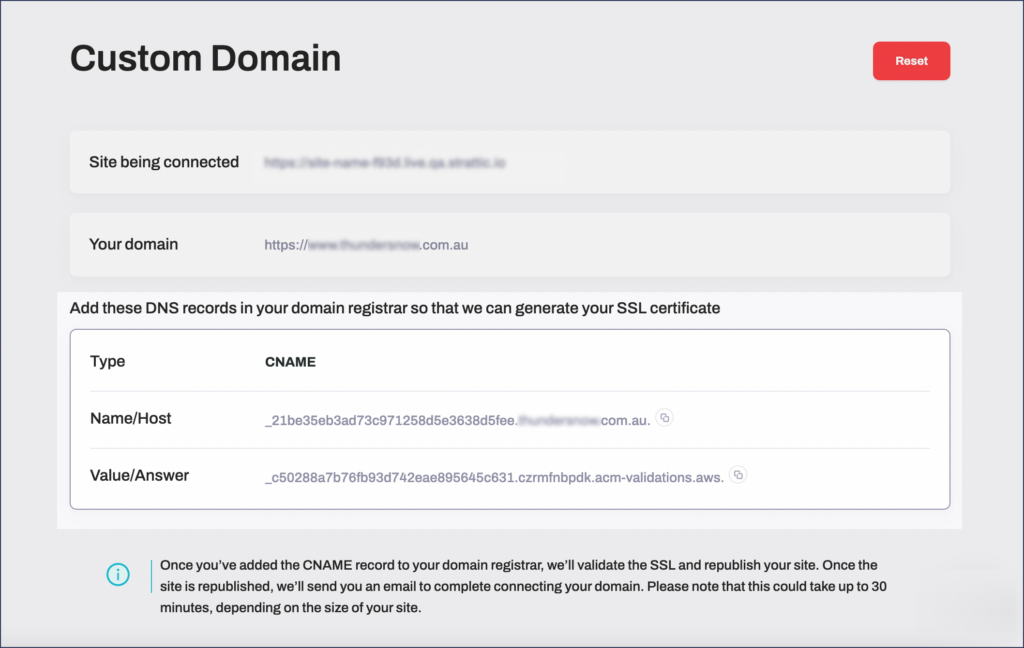
Step 4b.
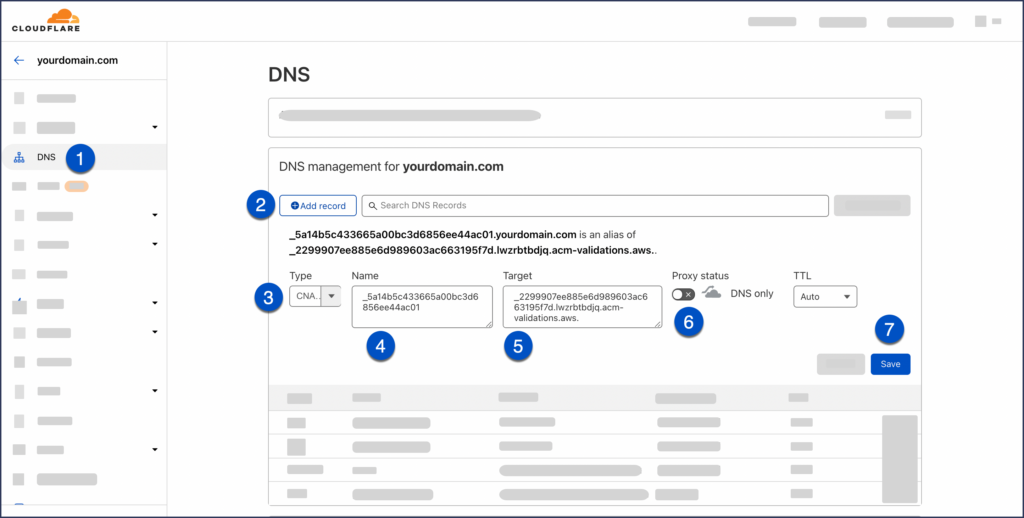
Add the CNAME into Cloudflare like in the screenshot below.
For the “Name”, you’ll only need the initial part
(e.g. _d2d081aafd36c470a1b632f29ddb63d5111) and you don’t need to include the domain name.
Please make sure to use the Proxy status of “DNS only” by clicking on the cloud icon.
Step 5b.
Please wait up to 30 minutes for this verification process to complete.
Once your SSL certificate is set up, you can move on to the final steps for pointing your domain to Strattic.
You’ll see a CNAME like this in your Strattic domain settings:
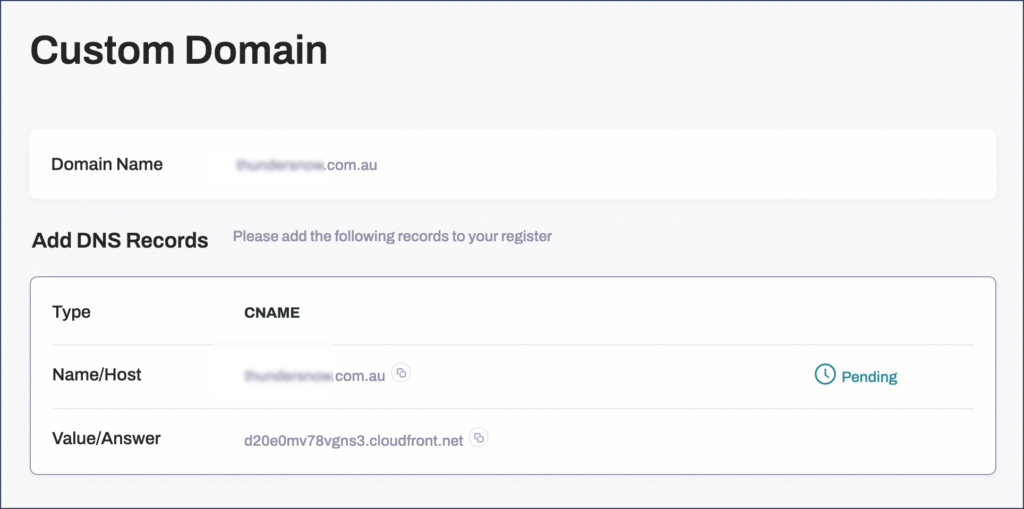
Step 6b.
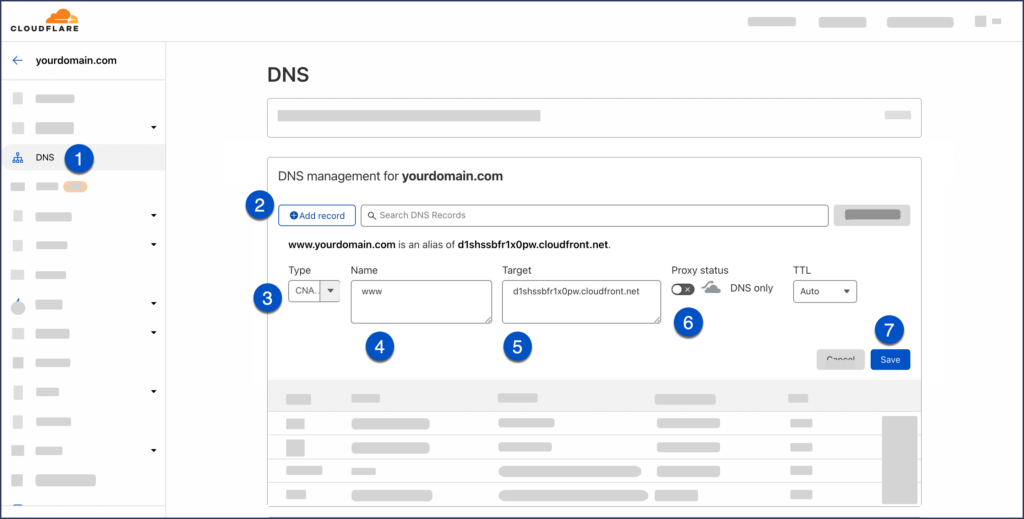
Add those CNAME records from the Strattic Dashboard into Cloudflare (see screenshot below) with “www” as the “Name”. Please make sure to use the Proxy status of “DNS only” by clicking on the cloud icon.
Step 7b.
Add both of the A records from the Strattic Dashboard into Cloudflare, one at a time, as follows with “@” as the “Name”
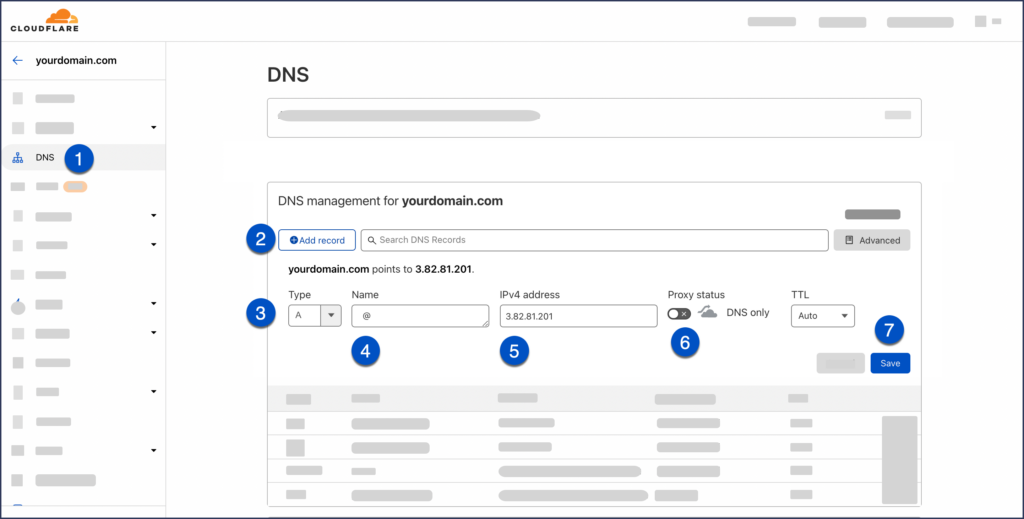
Step 8b.
Please allow up to 24 hours for the new DNS records to propagate.
Step 9b.
Woohooo! Your site is live on Strattic 🎉
FAQ / Troubleshooting
When should we use Cloudflare’s DNS only setting?
When set to DNS Only, Cloudflare doesn’t touch your traffic at all. We ask you to set DNS only on the CNAME record that is used for generating your SSL certificate (Step 4b).
Unless you choose to use Cloudflare settings for your domain, then we also ask you to set the A and WWW records to DNS only (Step 6b and 7b).
When should we use Cloudflare’s proxied (orange cloud) setting?
If you choose to use Cloudflare’s services (such as page rules, or CDN) you can enable the proxy status on your A and WWW records (Step 6b and 7b).
Can we use the Cloudflare’s CDN?
Using Cloudflare’s CDN on top of Strattic would be fine and we have many customers who are doing that. However, you would need to purge the Cloudflare cache every time you do a Strattic Publish. Strattic enterprise customers can perform this purge via a webhook.
Why isn’t my SSL certificate being issued?
In most cases, this occurs for two reasons.
Firstly, make sure you have set the SSL CNAME to DNS only as seen in Step 4b.
Next, if your DNS contains CAA records, you need to add both of the following CAA records in order to allow Strattic (via Amazon) to issue your SSL certificate for your live site.
Type: CAA.
Name: example.com
Tag: issue
CA domain name: amazon.com
Type: CAA.
Name: example.com
Tag: issuewild
CA domain name: amazon.com
If these two options haven’t solved your issue, please contact our live chat support.